JavaScript - Expense and Income Tracker with JavaScript

How to Build an Expense and Income Tracker with JavaScript


Expense and Income Tracker with JavaScript


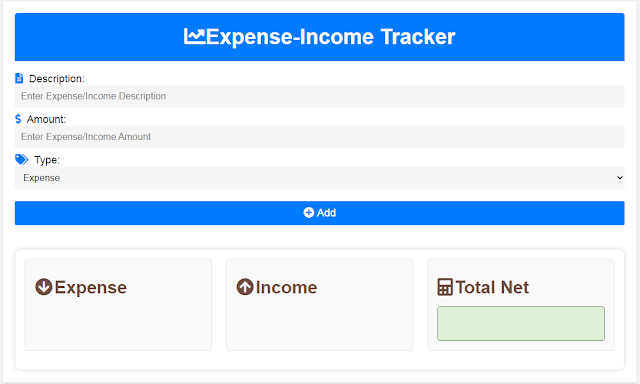
In this Javascript tutorial, we will see how to create a web application that allows users to enter their expenses and incomes, view a list of these transactions, and calculate the total net income (income - expenses).


Project Source Code:

HTML and CSS Page


<!DOCTYPE html>
<html>
<head>
<title>Expense and Income Tracker</title>
<link rel="stylesheet" type="text/css" href="style.css">
<link href="https://cdnjs.cloudflare.com/ajax/libs/font-awesome/5.15.3/css/all.min.css"
rel="stylesheet">
</head>
<body>

<div class="container">
<h1><i class="fas fa-chart-line"></i>Expense-Income Tracker</h1>
<form id="expense-form">
<label>
<i class="fas fa-file-alt"></i>Description:
<input type="text" id="description" placeholder="Enter Expense/Income Description">
</label>
<label>
<i class="fas fa-dollar-sign"></i>Amount:
<input type="number" id="amount" placeholder="Enter Expense/Income Amount">
</label>
<label>
<i class="fas fa-tags"></i>Type:
<select id="type">
<option value="expense">Expense</option>
<option value="income">Income</option>
</select>
</label>
<button type="button" id="btn-add"><i class="fas fa-plus-circle"></i>Add</button>
</form>
<div id="show-values">
<div class="box-expense">
<h2><i class="fas fa-arrow-circle-down"></i>Expense</h2>
<button class="btn" id="btn-clear-expense" style="display: none;">
<i class="fas fa-trash"></i>Clear All
</button>
<ul id="expense-list">
</ul>
</div>

<div class="box-income">
<h2><i class="fas fa-arrow-circle-up"></i>Income</h2>
<button class="btn" id="btn-clear-income" style="display: none;">
<i class="fas fa-trash"></i>Clear All
</button>
<ul id="income-list">
</ul>
</div>

<div class="box-calculate">
<h2><i class="fas fa-calculator"></i>Total Net
</h2> <span id="total"></span>
</div>
</div>

</div>


<script src="script.js"></script>


</body>
</html>


JavaScript Code


// Declare variables to store references to HTML elements
let expenseList = document.getElementById("expense-list");
let incomeList = document.getElementById("income-list");
let total = document.getElementById("total");
let expenseForm = document.getElementById("expense-form");
let description = document.getElementById("description");
let amount = document.getElementById("amount");
let type = document.getElementById("type");
let btnAdd = document.getElementById("btn-add");
let btnClearIncomes = document.getElementById("btn-clear-income");
let btnClearExpenses = document.getElementById("btn-clear-expense");

// Initialize arrays and variables for expenses and incomes
let expenses = [];
let incomes = [];
let totalExpenses = 0;
let totalIncomes = 0;

// Add event listener to the button add when clicked
btnAdd.addEventListener("click", function(){

// Create an object to represent the expense / income
let dataValues = { description:description.value,
amount: parseFloat(amount.value),
type:type.value
};

// If the expense / income has a description and amount, add it to the appropriate array
if(dataValues.description && dataValues.amount){

if(dataValues.type === "expense"){
expenses.push(dataValues);
totalExpenses += dataValues.amount;
}
else
{
incomes.push(dataValues);
totalIncomes += dataValues.amount;
}

// Clear the description and amount input fields, then update the lists and total
description.value = "";
amount.value = "";
updateLists();
updateTotal();
}

});


// Function to update the HTML lists of expenses and incomes
function updateLists(){
// Clear the lists
expenseList.innerHTML = "";
incomeList.innerHTML = "";


/* Loop through the expenses and incomes arrays and add each one to its
respective list as an HTML <li> element */
expenses.forEach(function(expense){
let li = document.createElement("li");
li.innerHTML = expense.description + ": $" + expense.amount;
expenseList.appendChild(li);
});

incomes.forEach(function(income){
let li = document.createElement("li");
li.innerHTML = income.description + ": $" + income.amount;
incomeList.appendChild(li);
});
}

// Function to update the total income and expenses and display the result
function updateTotal()
{
total.innerHTML = "";
let netIncome = totalIncomes - totalExpenses;

/* Display the net income with a minus sign if it's negative,
otherwise display it as a positive value */
if(netIncome < 0){
total.innerHTML = "-$" + -netIncome;
}
else{
total.innerHTML = "$" + netIncome;
}


// Hide the clear buttons if there are no expenses or incomes, otherwise show them
if(expenseList.children.length == 0 ){
btnClearExpenses.style.display = "none";
}else{
btnClearExpenses.style.display = "block";
}

if(incomeList.children.length == 0 ){
btnClearIncomes.style.display = "none";
}else{
btnClearIncomes.style.display = "block";
}


}


// Add event listeners to the clear buttons for expenses and incomes
btnClearExpenses.addEventListener("click", function(){

expenses = [];
totalExpenses = 0;
updateLists();
updateTotal();

});

btnClearIncomes.addEventListener("click", function(){

incomes = [];
totalIncomes = 0;
updateLists();
updateTotal();

});


Code Explanation:

This JavaScript code enables users to manage expenses and incomes by allowing them to input financial transactions, view lists of these transactions, and calculate the net income.

This JavaScript code performs the following actions:

1 - Variable Declarations: The code declares variables to store references to HTML elements such as expense and income lists, total, form inputs, and buttons. 
It also initializes arrays and variables for tracking expenses and incomes along with their totals.

2 - Add Event Listener: An event listener is added to the "Add" button (btnAdd) for managing the addition of expenses and incomes. 
When clicked, it generates a transaction object containing a description, amount, and type, and appends it to the appropriate array (either expenses or incomes). 
It subsequently updates the lists displaying these transactions and computes the total net income.

3 - Update Lists Function: A function (updateLists()) that updates the HTML lists for expenses and incomes. It clears the existing lists and then iterates through the expenses and incomes arrays, creating list items (HTML <li> elements) for each transaction.

4 - Update Total Function: The "updateTotal()" function calculates the net income by subtracting total expenses from total income, updating the "Total Net" display with the value (formatted as positive or negative), and controlling the visibility of "Clear" buttons based on transaction presence.

5 - Clear Buttons Event Listeners: The "Clear" buttons for expenses and incomes (btnClearExpenses and btnClearIncomes) have event listeners that, upon clicking, clear the corresponding arrays, reset the totals for expenses and incomes, and update the HTML lists and total net income.


OUTPUT:
Build an Expense and Income Tracker with JavaScript

JavaScript Expenses And Incomes Tracker App Source Code

if you want to download the project files click on the button below


download the source code


Java - Images Gallery Project In Netbeans

How to Create Image Gallery in Java NetBeans

How to Create Image Gallery in Java NetBeans


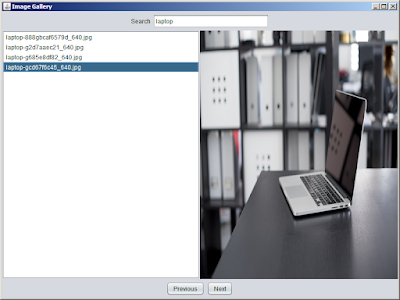
In this Java Long Tutorial we will see how How To Create an images gallery application using Java Swing in Netbeans.

What We Are Gonna Use In This Project:

- Java Programming Language.
- NetBeans Editor.

What We Will Do In This Project:

- Loaded Images from a specified directory (in this code, "C:\images"), and add the supported image files (with extensions such as jpg, jpeg, png, and gif) to the list of images.
- Displayed the selected image in in the image view.
- Navigate through the images using the "Previous" and "Next" buttons.
- Search for specific images by entering a search term in the text field, which filters the list to display matching image names.


Project Source Code:


package imagesgalleryapp;

import java.awt.BorderLayout;
import java.awt.FlowLayout;
import java.awt.GridLayout;
import java.awt.Image;
import java.awt.event.ActionEvent;
import java.awt.event.ActionListener;
import java.io.File;
import java.util.ArrayList;
import java.util.List;
import javax.swing.DefaultListModel;
import javax.swing.ImageIcon;
import javax.swing.JButton;
import javax.swing.JFrame;
import javax.swing.JLabel;
import javax.swing.JList;
import javax.swing.JPanel;
import javax.swing.JScrollPane;
import javax.swing.JTextField;
import javax.swing.ListSelectionModel;
import javax.swing.SwingUtilities;
import javax.swing.UIManager;

/**
 *
 * @author 1BestCsharp
 */

public class ImagesGalleryApp extends JFrame {

    private DefaultListModel<ImageInfo> imageListModel;
    private JList<ImageInfo> imageList;
    private JLabel imageView;
    private JButton prevButton;
    private JButton nextButton;
    private JTextField searchField;
    private List<ImageInfo> images;
    
    public ImagesGalleryApp(){
        try
        {
            UIManager.setLookAndFeel("javax.swing.plaf.nimbus.NimbusLookAndFeel");
        }
        catch(Exception ex)
        {
            ex.printStackTrace();
        }
        
        setTitle("Image Gallery");
        setDefaultCloseOperation(JFrame.EXIT_ON_CLOSE);
        setSize(800,600);
        setLocationRelativeTo(null);
        setLayout(new BorderLayout());
        images = new ArrayList<>();
        imageListModel = new DefaultListModel<>();
        initialize(); // initialize the user interface
        
    }
    
    // create a method to initialize the user interface
    private void initialize()
    {
        // Create a list to display image names
        imageList = new JList<>(imageListModel);
        imageList.setSelectionMode(ListSelectionModel.SINGLE_SELECTION);
        imageList.addListSelectionListener(e->displaySelectedImage());
        
        // Display selected image
        imageView = new JLabel();
        imageView.setHorizontalAlignment(JLabel.CENTER);
        
        // Previous & Next buttons to navigate images
        prevButton = new JButton("Previous");
        prevButton.addActionListener(new ActionListener() {
            @Override
            public void actionPerformed(ActionEvent e) {
            
                navigateImage(-1);
                
            }
        });
        
        nextButton = new JButton("Next");
        nextButton.addActionListener(new ActionListener() {
            @Override
            public void actionPerformed(ActionEvent e) {
            
                navigateImage(1);
                
            }
        });
        
        // Search field to filter images by name
        searchField = new JTextField(20);
        searchField.addActionListener(new ActionListener() {
            @Override
            public void actionPerformed(ActionEvent e) {
             
                searchImage(searchField.getText());
                
            }
        });
        
        // Create top panel containing search field
        JPanel topPanel = new JPanel(new FlowLayout(FlowLayout.CENTER));
        topPanel.add(new JLabel("Search"));
        topPanel.add(searchField);
        
        // Create center panel with list and image view
        JPanel centerPanel = new JPanel(new GridLayout(1, 2));
        centerPanel.add(new JScrollPane(imageList));
        centerPanel.add(imageView);
        
        // Create bottom panel with navigation buttons
        JPanel bottomPanel = new JPanel(new FlowLayout(FlowLayout.CENTER));
        bottomPanel.add(prevButton);
        bottomPanel.add(nextButton);
        
        // Add panels to the main frame
        add(topPanel, BorderLayout.NORTH);
        add(centerPanel, BorderLayout.CENTER);
        add(bottomPanel, BorderLayout.SOUTH);
        
    }


    // Create Class to store image information
    private class ImageInfo{
        
        private String filePath;
        private String name;
        
        public ImageInfo(String filePath, String name)
        {
            this.filePath = filePath;
            this.name = name;
        }
        
        @Override
        public String toString(){ return name; }
        
    }
    
    
    // Create a Function to Navigate through images
    private void navigateImage(int offset)
    {
        int selectedIndex = imageList.getSelectedIndex();
        if(selectedIndex >= 0)
        {
            int newIndex = (selectedIndex + offset + images.size()) % images.size();
            imageList.setSelectedIndex(newIndex);
            displaySelectedImage();
        }
    }


    // Create a Function to Search images based on the provided search term
    private void searchImage(String searchTerm)
    {
        imageListModel.clear();
        for(ImageInfo image : images)
        {
            if(image.name.toLowerCase().contains(searchTerm.toLowerCase()))
            {
                imageListModel.addElement(image);
            }
        }
        displaySelectedImage();
    }


    // Create a Function to Display selected image in the image view
    public void displaySelectedImage()
    {
        ImageInfo selectedImage = imageList.getSelectedValue();
        if(selectedImage != null)
        {
            ImageIcon imageIcon = new ImageIcon(selectedImage.filePath);
            Image scaledImage = imageIcon.getImage().getScaledInstance(imageView.getWidth(), imageView.getHeight(), Image.SCALE_SMOOTH);
            imageView.setIcon(new ImageIcon(scaledImage));
        }
    }


    // Create a Function to Load images from a specified directory
    private void loadImagesFromDirectory(String directoryPath)
    {
        File directory = new File(directoryPath);
        if(directory.isDirectory())
        {
            File[] imageFiles = directory.listFiles( 
                    file->file.isFile() && isSupported(file.getName()) );
            if(imageFiles != null)
            {
                for(File imageFile: imageFiles)
                {
                    images.add(new ImageInfo(imageFile.getAbsolutePath(), imageFile.getName()));
                    imageListModel.addElement(new ImageInfo(imageFile.getAbsolutePath(), imageFile.getName()));
                }
            }
        }
    }
    
    // Create a Function to Check if a file has a supported image extension
    private boolean isSupported(String fileName)
    {
        String[] supportedExtensions = {"jpg","jpeg","png","gif"};
        String extension = fileName.substring(fileName.lastIndexOf(".")+1).toLowerCase();
        
        for(String ext : supportedExtensions)
        {
            if(extension.equals(ext))
            {
                return true;
            }
        }
        
        return false;
    }


    public static void main(String[] args) {
        
        SwingUtilities.invokeLater(()->{
        
            ImagesGalleryApp app = new ImagesGalleryApp();
            app.loadImagesFromDirectory("C:\\images");
            app.setVisible(true);
            
        });
        
        
    }

}


The Final Result:


Java Image Gallery 1

Java Image Gallery 2

Java Image Gallery 3

Java Image Gallery 4


if you want to download the project files click on the button below

download the source code


PHP Students Management System Source Code

Students Management System In PHP With Source Code

Students Management System In PHP With Source Code


in this php project demo, we will discover the capabilities of a Students Management System.
This project is built using PHP and JavaScript programming languages, along with a MySQL database.
this students system allow users to manage students, courses, enrollments and marks.

Tools:
- Apache server.
- PHP + JavaScript programming Language.
- Html + Css.
- font awesome library.
- MySQL Database.


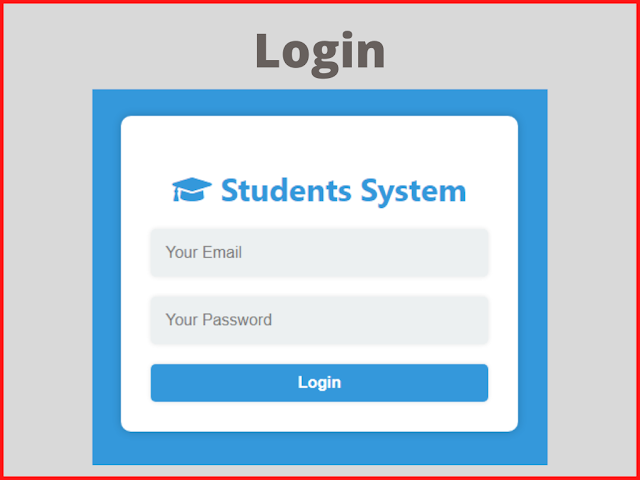
1 - Login Page

Students Management System In PHP - Login Page

this form allow users and admin to login into the system.

login form


If you enter an invalid email or password, an error message will be displayed, alerting you to the incorrect login credentials.

login form - incorrect password

login form - incorrect email


if you enter the correct email and password, you will be redirected to the Dashboard page.

2 - Dashboard Page


Students Management System In PHP - Dashboard Page


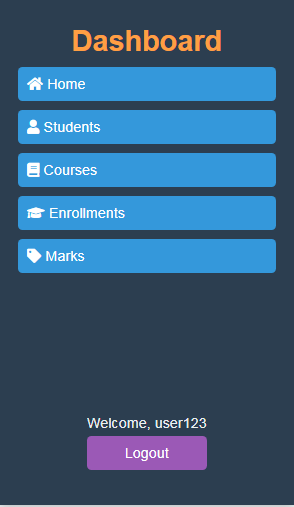
the dashboard page contains the following sections:
1 - SideBar Menu: The page, along with other pages, features a sidebar menu section. 
This menu is included from the "common-section.php" file using a PHP include statement. 
This menu include a logout button so users can quit the application.
The visibility of the "Users" link depends on the user's role. 
If the user is an admin, the link is visible; otherwise, it is hidden.

SideBar Menu For Admins
Admin


if the user type is an admin the link to manage users will be visible, and if it's not an admin it will be invisible.

SideBar Menu For Users
User


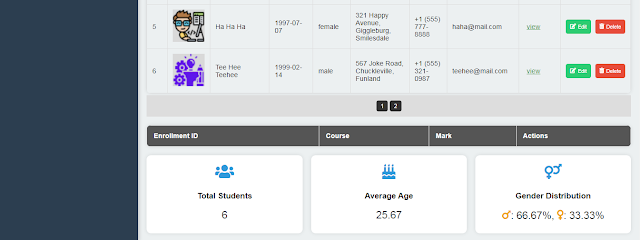
2 - Analytics Boxes: The page showcases a set of boxes that provide essential analytics information. Each box represents a different metric and consists of an icon, a title, and a corresponding value.

The values displayed in these boxes are retrieved from PHP variables and dynamically populated using PHP code (e.g., <?= count($students)?>).


Analytics Boxes


3 - Students Page

Students Management System In PHP - Students Page

This Student Dashboard provides a view of student demographics, including name, birthdate, gender, contact information, and more.

The dashboard offers insights into the gender distribution among enrolled students, allowing administrators to analyze gender diversity within the student body.

Student Dashboard 1
Student Dashboard 2


Add Student.

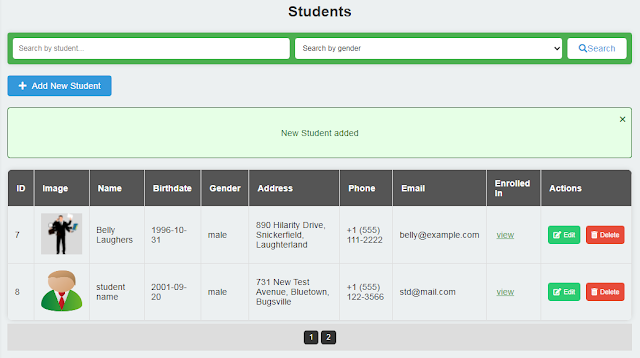
To add a new student, click on the 'Add New Student' button. 
A modal will appear to collect the student's information. 
If the insertion is successful, a message will appear to notify the user using PHP cookies.

Add New Student

Student Added


Edit Student.

To edit a student, click the edit button in the table corresponding to the student you want to edit. 
A modal will appear to collect the new student's information. 
If the update is successful, a message will appear to notify the user using PHP cookies.

Edit Student

Student Edited


Remove Student.

Like for the edit, click the 'Delete' button to remove a student.

Remove Student

Student Removed


Search Students.

To search for students, you can utilize the search bar. 
Users can search by gender, a specific value, or both.

Search For Female Students
female students

Search For Male Students
male students

Search Students
Search Students ('ha' query)


Student Enrolled In:

To view the courses a specific student is enrolled in, click on the 'view' link in the table. 
The courses will be displayed in a table below the student's information. 
The table shows the courses and the student's mark on them if available; if not, a button to set the mark will be displayed.

Student Courses


Set Student Mark.

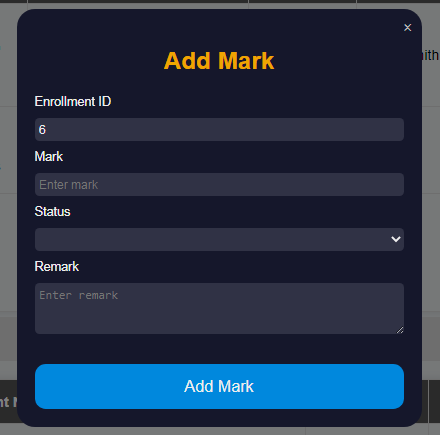
To set a student's mark for a course, click on the 'Set Mark' button in the table. 
A modal will appear, allowing you to enter the student's mark, status (Pass or Fail), and a remark. 
If a student already has a mark for the course, the 'Set Mark' button will not be visible


Set Student Mark

Student Mark Added

Student Courses With Marks


4 - Courses Page

Students Management System In PHP - Courses Page

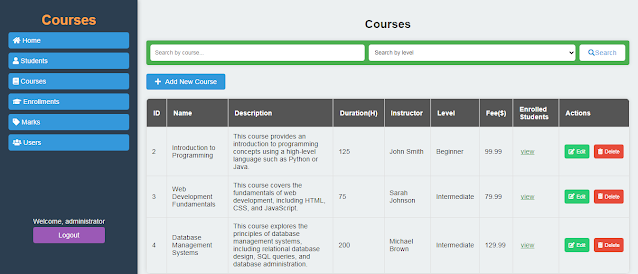
This Course Dashboard displays a table with information about each course, including ID, name, description, duration, instructor, level, fee, and actions (such as editing or deleting).
Users can add new courses, edit existing courses, and remove courses using modal forms.


Course Dashboard 1
Course Dashboard 2


Add Course.

To add a new course, click on the 'Add New Course' button. 
A modal will appear to collect the course's information. 
If the insertion is successful, a message will appear to notify the user using PHP cookies.

Add New Course

Add New Course 2

Course Added


If course name already exists.

course name already exists


Edit Course.

To edit a course, click the edit button in the table corresponding to the course you want to edit. 
A modal will appear to collect the new course's information. 
If the update is successful, a message will appear to notify the user using PHP cookies.

Edit Course

Course Edited


Remove Course.

Like for the edit, click the 'Delete' button to remove a course.

Remove Course

Course Removed


Search Courses.

To search for courses, you can utilize the search bar. 
Users can search by level (beginner, intermediate, advanced), a specific value, or both.


Search Courses 1

Search Courses 2

Search Courses 3

Search Courses 4

View Students Enrolled In Selected Course:

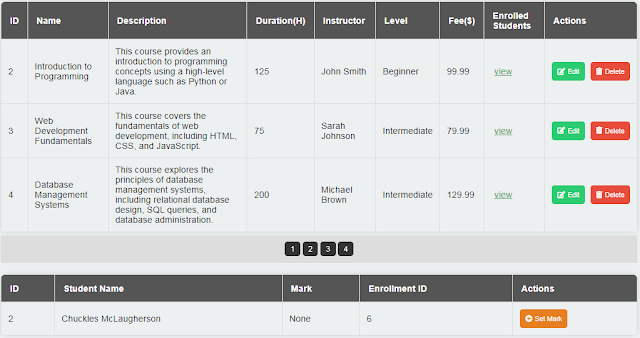
To view the students enrolled in a specific course, click on the 'view' link in the table. 
The students will be displayed in a table below the course information. 
The table shows the students and their marks on this course, if available; if not, a button to set the mark will be displayed.

students enrolled in a course

courses - add mark

courses - add mark 2


5 - Enrollments Page

Students Management System In PHP - Enrollments Page


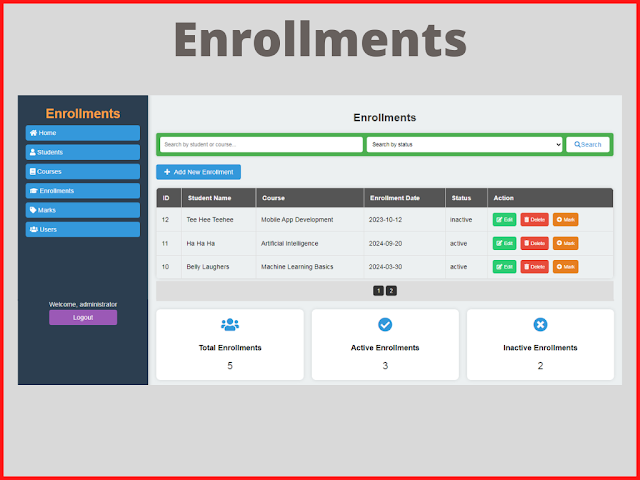
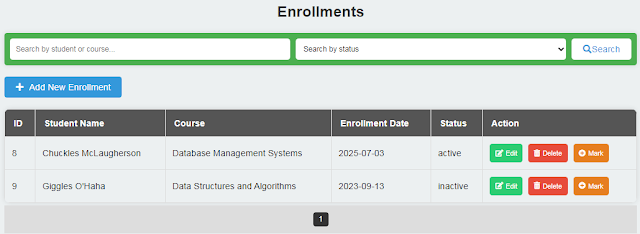
This Enrollments Dashboard displays a table with information about each enrollment, including enrollment ID, student name, course name, enrollment date, enrollment status, and action buttons for editing, deleting, and marking.
Users can add new enrollments, edit existing enrollments, and remove enrollments using modal forms.
It displays total enrollments, active enrollments, and inactive enrollments in separate cards.


Enrollments Dashboard 1
Enrollments Dashboard 2


Add Enrollment.

To add a new course, click on the 'Add New Enrollment' button. 
A modal will appear to collect the enrollment's information. 
If the insertion is successful, a message will appear to notify the user using PHP cookies.

Add Enrollment

Enrollment Added


Enrollement Already Exists:

Before adding a new enrollment, we will verify that an active enrollment for the same student and course does not already exist in the records.

Enrollement Already Exists


Edit Enrollement.

To edit a enrollment, click the edit button in the table corresponding to the enrollment you want to edit. 
A modal will appear to collect the new enrollment's information. 
If the update is successful, a message will appear to notify the user using PHP cookies.

Edit Enrollement

Enrollement Edited


Remove Enrollement.

Like for the edit, click the 'Delete' button to remove an enrollment.

Remove Enrollement

Enrollement Removed


Add Enrollement Mark.

To set a mark for an enrollment, click on the 'Set Mark' button in the table.

Add Enrollement Mark

Add Enrollement Mark 2

If an enrollment already has a mark, the 'Set Mark' button will be disabled.

Enrollements


Search Enrollement.

To search for enrollments, you can utilize the search bar. 
Users can search by status (acive, inactive), a specific value, or both.

Search Enrollement

Search Enrollement 2

Search Enrollement 3


6 - Marks Page

Students Management System In PHP - Marks Page


This Marks Dashboard displays a table with information about each Mark.
Users can edit existing marks, and remove marks using modal forms.
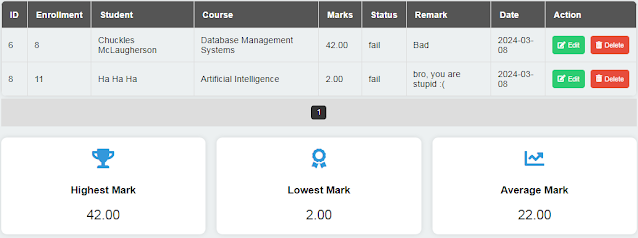
It also display statistics such as the highest mark, lowest mark, and average mark based on the retrieved marks data.
To add a mark you can use the Student, Course, Enrollment Dashboard.

Marks Dashboard


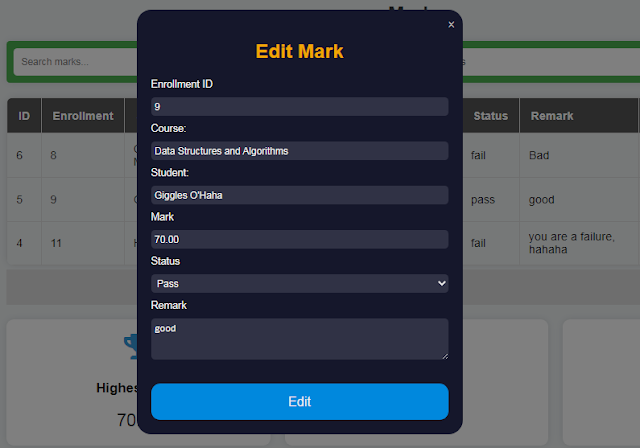
Edit Mark.

To edit a mark, click the edit button in the table corresponding to the mark you want to edit. 
A modal will appear to collect the information for the new mark. 
Users can only edit the mark value, status, and remark; the enrollment ID remains the same

Edit Mark

Mark Edited


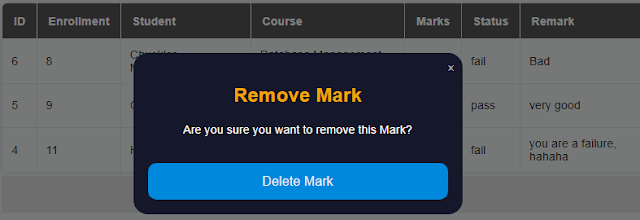
Remove Mark.

To remove a mark, simply click the 'Delete' button in the table next to the mark you wish to remove.

Remove Mark

Mark Removed


Search Mark.

You can search by status (pass or fail) or by a specific value.

Search Mark - fail
fail

Search Mark - pass
pass

Search Mark - query
query "ha"


8 - Users Page

Students Management System In PHP - Users Page


Users are redirected to this page only if they are logged in as an administrator (admin role).
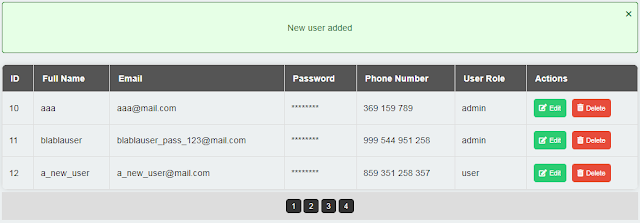
All users stored in the database are retrieved and displayed in a table format.


Users Dashboard


Add User:

Administrators can add new users by filling out a form. 
They need to provide the user's name, email, phone number, password, confirm password, and user type (admin or user).
When adding or editing a user, the system checks if the entered password and confirm password fields match before submission.

Add User

Add User - passwords do not match

User Added


Administrators cannot add or edit a user email address with one that already exists.

user email address already exists


Edit User:

Existing users can be edited by clicking the "Edit" button next to their details in the table. 
This opens a form with pre-filled fields, allowing administrators to modify the user's information.

Edit User

User Edited


Remove User:

Administrators can remove users by clicking the "Delete" button next to their details in the table. 
A confirmation modal appears before deleting the user.

Remove User

User Removed


Search User:

Users can search for specific users by name and user type (admin or user). 
The search results are displayed dynamically on the page.

Search Users

Search User 2

Search User 3


if you want the source code click on the download button below