Python - Create Image Slider In Tkinter

How To Make a Python Image Slider Using Tkinter

Python - Create Image Slider In Tkinter


In this Python Tutorial we will see How to Make an Imges Viewer Using Tkinter .
To create this simple image slider application, we need to use the Tkinter library for graphical user interface (GUI) and the Python Imaging Library (PIL) for image handling.


Project Source Code:


import tkinter as tk
from tkinter import Tk
from PIL import ImageTk, Image


# Create a Tkinter root window
root = Tk()
root.geometry('400x400')
root.title("Slider")

# List of image file paths
pics_list = ["C:/Users/1BestCsharp/Downloads/lms images/New folder/prd1.png",
"C:/Users/1BestCsharp/Downloads/lms images/New folder/prd2.png",
"C:/Users/1BestCsharp/Downloads/lms images/New folder/prd3.png",
"C:/Users/1BestCsharp/Downloads/lms images/New folder/prd4.png",
"C:/Users/1BestCsharp/Downloads/lms images/New folder/prd5.png",
"C:/Users/1BestCsharp/Downloads/lms images/New folder/prd6.png"]


# Create labels for displaying image and navigation buttons
lbl_next = tk.Label(text=">", font=("Verdana",25))
lbl_previous = tk.Label(text="<", font=("Verdana",25))
lbl_picture = tk.Label()

# Grid layout for labels
lbl_previous.grid(row=0, column=0)
lbl_picture.grid(row=0, column=1)
lbl_next.grid(row=0, column=2)

# Initialize the index to track the current image
index = 0

def nextImage():
global index, img

# Increment the index to show the next image in the list
index += 1
# If the index goes beyond the last image, loop back to the first image
if index > len(pics_list) - 1:
index = 0

# Load and display the image at the current index
img = Image.open(pics_list[index])
img = img.resize((330,400), Image.ANTIALIAS)
img = ImageTk.PhotoImage(img)
lbl_picture['image'] = img


def previousImage():
global index, img

# Decrement the index to show the previous image in the list
index -= 1

# If the index goes below 0, loop back to the last image
if index < 0:
index = len(pics_list) - 1

# Load and display the image at the current index
img = Image.open(pics_list[index])
img = img.resize((330,400), Image.ANTIALIAS)
img = ImageTk.PhotoImage(img)
lbl_picture['image'] = img


# Bind the navigation buttons to their respective functions
lbl_next.bind("<Button-1>", lambda abc : nextImage())
lbl_previous.bind("<Button-1>", lambda abc : previousImage())


# Show the first image in the list when the program starts
nextImage()

# Start the Tkinter event loop
root.mainloop()


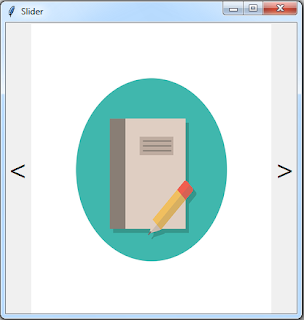
////// OUTPUT : 

Python Tutorial: How to Make an Image Slider Using Tkinter

How to Make an Image Slider In Python Using Tkinter

How to Make an Image Slider In Python Using Tkinter


download the source code


PHP Inventory Management System Source Code

Inventory Management System In PHP With Source Code

PHP Inventory Management System Source Code

in this php project demo, you will discover the capabilities of an Inventory Management System.
This project is built using PHP and JavaScript programming languages, along with a MySQL database.
this Inventory allow users to manage customers, categories, products and orders.

Tools:
- Apache server.
- PHP + JavaScript programming Language.
- Html + Css.
- font awesome library.
- MySQL Database.


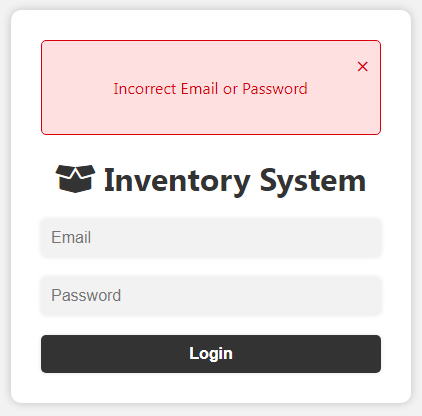
1 - Login Page

this form allow users and admin to login into the system.

Login Page


If you enter an invalid email or password, an error message will be displayed, alerting you to the incorrect login credentials.

Login Page - Error


if you enter the correct email and password, you will be redirected to the Dashboard page.

2 - Dashboard Page

the dashboard page contains the following sections:
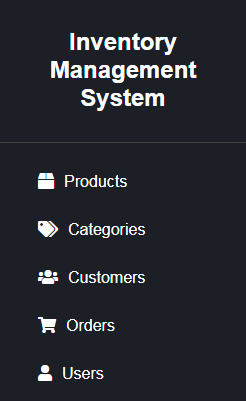
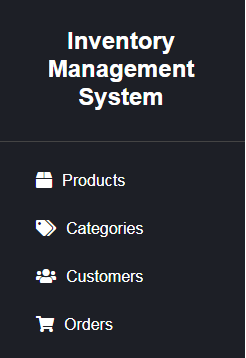
1 - SideBar Menu: The page, along with other pages, features a sidebar menu section. 
This menu is included from the "common-section.php" file using a PHP include statement. 
The visibility of the "Users" link depends on the user's role. 
If the user is an admin, the link is visible; otherwise, it is hidden.

SideBar Menu - User

if the user type is an admin the link to manage users will be visible, and if it's not an admin it will be invisible.

SideBar Menu - Admin


2 - Analytics Boxes: The page showcases a set of boxes that provide essential analytics information. Each box represents a different metric and consists of an icon, a title, and a corresponding value.

The values displayed in these boxes are retrieved from PHP variables and dynamically populated using PHP code (e.g., <?php echo $totalProducts; ?>).


Analytics Boxes

3 - Category Page

Category Page

The page presents a form and a table related to categories.

The Category Form allows users to manage categories. 
It includes a form with input fields for category ID and name, and buttons for adding, editing, and removing categories.

The Category Table show a list of categories dynamically generated from the database table rows using PHP. 
Each row represents a category and includes a button to view products associated with that category.

The Product Table displays products within a selected category. 
Initially, it shows a heading with a placeholder category name. 
The table content will be loaded dynamically when a category is selected using the "View Products" button. 
This section includes a JavaScript script that handles the button click event and makes an AJAX request to fetch and display the products for the selected category.


Category Page

Javascript Guess The Word Game

How To Make a Word Guessing  Game In Javascript Using VS Code

Javascript Guess The Word Game


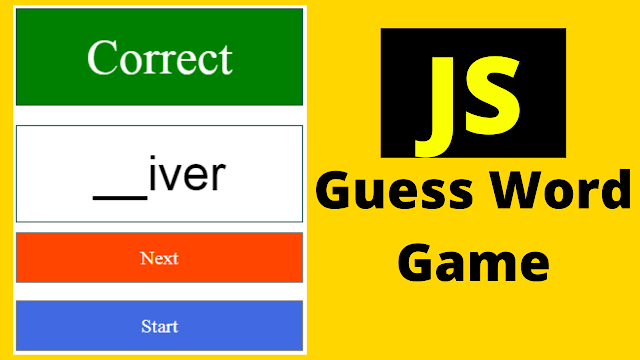
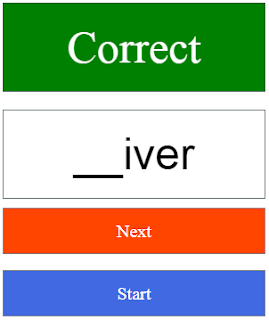
In This Javascript Tutorial we will See How To Create a simple guessing game using HTML, CSS, and JavaScript! .
In this project, we will build a game where the player needs to guess a word with some hidden characters.


Project Source Code:


<!DOCTYPE HTML>

<head>
<style>
p, input{border:1px solid darkslategrey; width: 20%;
padding: 20px; font-size: 50px; margin: 10px 10px 10px 0}

#result{background-color: rgb(253, 189, 27); text-align: center;}

input{text-align: center}

a{display: block; width: 20%; border: 1px solid gray;
height: 50px; line-height: 50px; text-align: center;
background-color: orangered; color: #fff; text-decoration: none;
font-size: 20px; padding:0px 20px 0px 20px}

a:nth-of-type(2){background-color: royalblue}

</style>
</head>

<body>

<p id="result">Result</p>

<input type="text" id="guess"><br>

<a href="#" onclick="nextWord()">Next</a><br>

<a href="#" onclick="start()">Start</a><br>

<script>

// Initializing variables
result = document.getElementById("result");
guess = document.getElementById("guess");
index = -1;
words = ["potato","driver", "tomato","history", "computer",
"appartment", "forest", "chocolat", "lawyer"];

// Function to replace character at a specific index in a string
function setCharAt(str,ind,chr)
{
if(ind > str.length-1) return str;
return str.substring(0,ind) + chr + str.substring(ind+1);
}

// Function to display the current word with random characters hidden
function displayWord()
{
if(index == -1)
{
result.innerText = "--Result--";
guess.value = "GUESS";
}
else
{
word = words[index];
pos1 = Math.floor(Math.random()*words[index].length);
pos2 = Math.floor(Math.random()*words[index].length);
pos3 = Math.floor(Math.random()*words[index].length);

word = setCharAt(word,pos1,'_');
word = setCharAt(word,pos2,'_');
word = setCharAt(word,pos3,'_');

guess.value = word;

}
}

// Function to check the user's guess against the current word
function checkWord()
{
if(guess.value == words[index])
{
result.innerText = "Correct";
result.style.backgroundColor = "Green";
result.style.color = "#fff";
}
else
{
result.innerText = "Wrong";
result.style.backgroundColor = "Red";
result.style.color = "#fff";
}
}
// Function to move to the next word
function nextWord()
{
checkWord();
if(index < words.length - 1)
{
index++;
displayWord();
}
}

// Function to start the game
function start()
{
index = 0;
result.innerText = "--Result--";
guess.value = "GUESS";
result.style.backgroundColor = "rgb(253, 189, 27)";
result.style.color = "#000";
displayWord();
}

// Display the initial word
displayWord();

</script>


</body>

</html>


The main logic of the game resides in two functions: displayWord() and checkWord(). 

The displayWord() function will randomly hide three characters of the current word using underscores (_) and update the input field accordingly. 

The checkWord() function will compare the player's guess with the actual word and display the result in the result paragraph.

We will also implement the nextWord() function to handle moving to the next word in the array and calling the necessary functions to update the display.

Finally, we will create the start() function to initialize the game, setting the initial values, and displaying the first word.


////// OUTPUT : 
Word Guessing  Game In Javascript

Word Guessing  Game In Javascript

Guess the Word Game In Javascript

Guess the Word Game In Javascript


download the source code


PYTHON - How To Get TreeView Column Max, Min, Sum, Average Value In Python Tkinter

Python - How To Get The Sum, Max, Min, Avg Value Of A TreeView Column Using Python Tkinter


TreeView Column Max, Min, Sum, Average Value In Python Tkinter


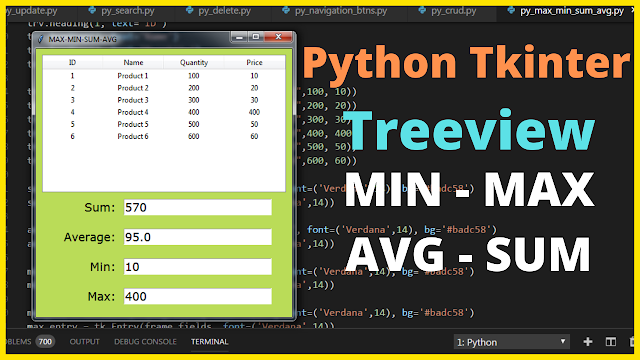
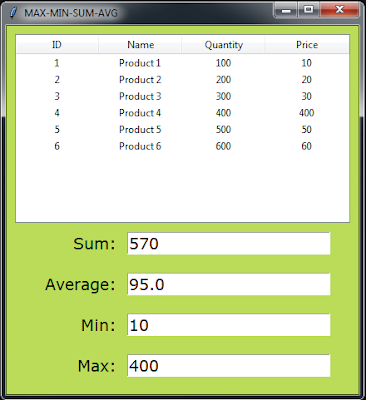
In This Python Tutorial  We Will See How To Get The Average, Max, Min, Sum Value From Specific Treeview Column And Display Them In TextBoxes Using Python Programming Language.


Project Source Code:

import tkinter as tk
from tkinter import *
from tkinter import ttk


root = Tk()
root.title("MAX-MIN-SUM-AVG")

frame_container = tk.Frame(root, padx=10, pady=10, bg='#badc58')
frame_fields = tk.Frame(frame_container, bg='#badc58')

# create treeview
trv = ttk.Treeview(frame_container, columns=(1,2,3,4), show='headings')

trv.column(1, anchor='center', width=100)
trv.column(2, anchor='center', width=100)
trv.column(3, anchor='center', width=100)
trv.column(4, anchor='center', width=100)

trv.heading(1, text='ID')
trv.heading(2, text='Name')
trv.heading(3, text='Quantity')
trv.heading(4, text='Price')

# add items to the treeview
trv.insert("",'end', iid=1, values=(1,"Product 1",100, 10))
trv.insert("",'end', iid=2, values=(2,"Product 2",200, 20))
trv.insert("",'end', iid=3, values=(3,"Product 3",300, 30))
trv.insert("",'end', iid=4, values=(4,"Product 4",400, 400))
trv.insert("",'end', iid=5, values=(5,"Product 5",500, 50))
trv.insert("",'end', iid=6, values=(6,"Product 6",600, 60))

# sum value
sum_lbl = tk.Label(frame_fields, text='Sum:', font=('Verdana',14), bg='#badc58')
sum_entry = tk.Entry(frame_fields, font=('Verdana',14))

# average value
avg_lbl = tk.Label(frame_fields, text='Average:', font=('Verdana',14), bg='#badc58')
avg_entry = tk.Entry(frame_fields, font=('Verdana',14))

# minimum value
min_lbl = tk.Label(frame_fields, text='Min:', font=('Verdana',14), bg='#badc58')
min_entry = tk.Entry(frame_fields, font=('Verdana',14))

# maximum value
max_lbl = tk.Label(frame_fields, text='Max:', font=('Verdana',14), bg='#badc58')
max_entry = tk.Entry(frame_fields, font=('Verdana',14))

sum_lbl.grid(row=0, column=0, padx=10, pady=10, sticky='e')
sum_entry.grid(row=0, column=1)

avg_lbl.grid(row=1, column=0, padx=10, pady=10, sticky='e')
avg_entry.grid(row=1, column=1)

min_lbl.grid(row=2, column=0, padx=10, pady=10, sticky='e')
min_entry.grid(row=2, column=1)

max_lbl.grid(row=3, column=0, padx=10, pady=10, sticky='e')
max_entry.grid(row=3, column=1)


# function to display the sum value
def getSum(item=""):
val = 0
for row in trv.get_children(item):
#print(trv.item(row)["values"][3])# print price
val = val + trv.item(row)["values"][3]
print(val)
sum_entry.insert(0,val)


# function to display the average value
def getAvg(item=""):
val = 0
for row in trv.get_children(item):
#print(trv.item(row)["values"][3])# print price
val = val + trv.item(row)["values"][3]

val = val/len(trv.get_children())
avg_entry.insert(0,val)


# function to display the minimum value
def getMin():
val = trv.item("1")["values"][3] # get the first value
for row in trv.get_children():
#print(trv.item(row)["values"][3])# print price
if val > trv.item(row)["values"][3]:
val = trv.item(row)["values"][3]
min_entry.insert(0,val)


# function to display the maximum value
def getMax():
val = trv.item("1")["values"][3] # get the first value
for row in trv.get_children():
#print(trv.item(row)["values"][3])# print price
if val < trv.item(row)["values"][3]:
val = trv.item(row)["values"][3]
max_entry.insert(0,val)


getSum()
getAvg()
getMin()
getMax()

trv.pack()
frame_container.pack()
frame_fields.pack()

root.mainloop()

      
///////////////OUTPUT:

Sum, Max, Min, Avg Value Of A TreeView Column Using Python Tkinter


Download the .py file

download the source code


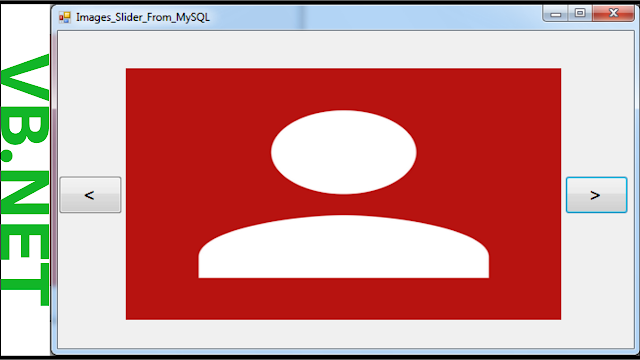
VB.Net Images Slider From MySQL Database

How To Make Images SlideShow From MySQL Database In Visual Basic.Net 

Images SlideShow From MySQL Using VBnet

In This VB.Net and MySQL Tutorial We Will See How To Make an Image SlideShow With Images From MySQL Database Table Using Visual Basic.Net Programming Language And Visual Studio Editor.

we need to create two buttons:
1-  ">" => go to the next image
2- "<" => go to the previous image

- To Learn More Watch The Video Tutorial Below. 


Project Source Code:

Imports MySql.Data.MySqlClient
Imports System.IO

Public Class Images_Slider_From_MySQL

    ' create a connectio with mysql database
    Dim connection As New MySqlConnection("datasource=localhost;port=3306;username=root;password=;database=vbnet_student_db")

    ' table to store images
    Dim table As New DataTable()

    ' the row index for the images
    Dim rowIndex As Integer

    ' form load
    Private Sub Images_Slider_From_MySQL_Load(sender As Object, e As EventArgs) Handles MyBase.Load

        Dim command As New MySqlCommand("SELECT picture FROM `student`", connection)
        Dim adapter As New MySqlDataAdapter(command)
        adapter.Fill(table)

        rowIndex = 0

        displayImage()

    End Sub


    ' create a sub to display images using the row index
    Sub displayImage()

        Dim imgByte As Byte()

        imgByte = table(rowIndex)(0)

        Dim ms As New MemoryStream(imgByte)

        PictureBox1.Image = Image.FromStream(ms)

    End Sub

    ' button next
    Private Sub Button_Next_Click(sender As Object, e As EventArgs) Handles Button_Next.Click

        If rowIndex <= table.Rows.Count - 2 Then

            rowIndex = rowIndex + 1
            displayImage()

        End If
        

    End Sub

    ' button previous
    Private Sub Button_Previous_Click(sender As Object, e As EventArgs) Handles Button_Previous.Click

        If rowIndex >= 1 Then

            rowIndex = rowIndex - 1
            displayImage()

        End If
        

    End Sub
End Class  


///////////////OUTPUT:


How To Make Images Slider From Database Using Vbnet