JavaScript - Generating Random Colors with JavaScript

How to Generate Random Colors Using JavaScript


Generating Random Colors with JavaScript


In this Javascript tutorial, we will explore a JavaScript code that generates random colors and applies them dynamically to four child elements within an HTML container


Project Source Code:


<!DOCTYPE html>
<html>

<head>
<title>Random Color Generator</title>
<style>
body{ margin: 0; padding: 0; background-color: #f9f9f9;
font-family: 'Segoe UI', Tahoma, Geneva, Verdana, sans-serif;
}

.container{ max-width: 1200px; margin: 0 auto; padding: 2rem; text-align: center; }

.content{ display: flex; flex-wrap: wrap; justify-content: center; margin: 2rem 0;}

.child{ width: 250px; height: 250px; border: 1px solid #ddd; margin: 1rem;
border-radius: 4px; box-shadow: 0 0 10px rgba(0, 0, 0, 0.1);
}
#generate-btn{ padding: 0.5rem 1rem; border: none; border-radius: 4px;
color: #fff; background-color: orange; font-size: 1rem;
cursor: pointer; transition: all 0.3s ease;
}
#generate-btn:hover{ background-color: darkorange;
box-shadow: 0 0 0 1px rgba(0, 0, 0, 0.2);
}

</style>
</head>
<body>

<div class="container">
<div class="content">
<div class="child" id="child1"></div>
<div class="child" id="child2"></div>
<div class="child" id="child3"></div>
<div class="child" id="child4"></div>
</div>
<button id="generate-btn">Generate Random Colors</button>

</div>

<script>

// Get references to the four child elements in the HTML
const child1 = document.getElementById("child1");
const child2 = document.getElementById("child2");
const child3 = document.getElementById("child3");
const child4 = document.getElementById("child4");

// This function generates a random color in hexadecimal format
function generateRandomColors()
{
let letters = "0123456789ABCDEF"; // String containing all possible hex digits
let color = "#"; // Initialize the color string with the # symbol

// Generate six random hexadecimal digits to form a color
for(let i = 0; i < 6; i++)
{
// Add a random hex digit to the color string
color += letters[Math.floor(Math.random() * 16)];
}

return color; // Return the generated color string

}

// This function changes the background color of the four child elements
// to randomly generated colors
function changeBackgroundColor()
{
child1.style.backgroundColor = generateRandomColors();
child2.style.backgroundColor = generateRandomColors();
child3.style.backgroundColor = generateRandomColors();
child4.style.backgroundColor = generateRandomColors();
}

// Get a reference to the HTML button element with the ID "generate-btn"
const generateBtn = document.getElementById("generate-btn");

// Add a "click" event listener to the button,
// which triggers the changeBackColor function
generateBtn.addEventListener("click", changeBackgroundColor);


</script>

</body>
</html>


Code Explanation:

This JavaScript code performs the following actions:

1 - HTML Structure: The HTML code consists of a container div that encapsulates four child div elements. Each child div has a unique ID assigned to it.

2 - Retrieving HTML Element References: Using the document.getElementById() method, the code retrieves references to the four child elements and assigns them to respective variables (child1, child2, child3, and child4).

3 - Generating Random Colors: The generateRandomColors() function generates a random color in hexadecimal format. It does so by concatenating six random hexadecimal digits (0-9, A-F) to form a valid color code.

4 - Changing Background Colors: The changeBackgroundColor() function changes the background color of each child element by setting the style.backgroundColor property to a randomly generated color obtained from the generateRandomColors() function.

5 - Event Handling: The code attaches an event listener to the button element with the ID "generate-btn" using the document.getElementById() method. When the button is clicked, the changeBackgroundColor() function is triggered, resulting in a new set of random colors being applied to the child elements.


OUTPUT:
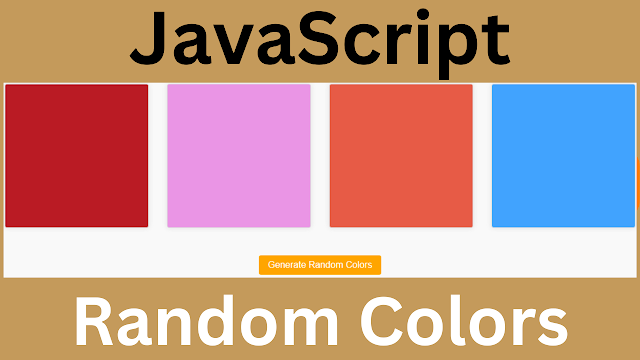
How to Generate Random Colors Using JavaScript


Python Calculator Using Tkinter Source Code

How To Create A Calculator In Python and Tkinter

How To Create A Calculator In Python and Tkinter


In This Python Tutorial we will See How To Make A Simple Windows Form Calculator Application To Do The Basic Operations (+, -, /, *) And Reset To Make Another  Calc Using tkinter In Visual Code Editor .


Project Source Code:

   
import tkinter as tk
from tkinter import *
from tkinter import ttk
from tkinter.ttk import *

root = Tk()

buttons = []

btns_vals = {'0-0':'1','0-1':'2','0-2':'3','0-3':'4',
'1-0':'5','1-1':'6','1-2':'7','1-3':'8',
'2-0':'9','2-1':'0','2-2':'.','2-3':'=',
'3-0':'+','3-1':'-','3-2':'/','3-3':'*',}


textbox = tk.Entry(root, width="30", font=("Arial",20))
textbox.grid(row="0", column="0", columnspan="4")


def displayVal(row_index, column_index):

# get the textbox value
textbox_val = textbox.get()
# clear textbox
textbox.delete(0,END)
# get the clicked button value
btn_val = buttons[row_index][column_index]['text']
# new val
val = textbox_val + btn_val
# display the new val in textbox
textbox.insert(0,val)


# create a function to calculate
def calc(opr):
if opr != '=':
global calc_opr, number_1
calc_opr = opr
number_1 = float(textbox.get())
textbox.delete(0,END)

elif opr == '=':
number_2 = float(textbox.get())
if calc_opr == '+':
val = number_1 + number_2
elif calc_opr == '-':
val = number_1 - number_2
elif calc_opr == '/':
val = number_1 / number_2
elif calc_opr == '*':
val = number_1 * number_2

textbox.delete(0,END)
textbox.insert(0,val)


# create a function to clear textbox
def clear():
textbox.delete(0,END)


# display buttons
for i in range(4):
btn_row = []
for j in range(4):
key = "{i}-{j}".format(i=i,j=j)
button = tk.Button(root, padx=15, pady=15, text = btns_vals[key],
font=("Arial",20))

if btns_vals[key] not in ('=','+','-','*','/'):
button['bg'] = 'Black'
button['fg'] = 'White'
button['command'] = lambda theRow = i,
theCol = j : displayVal(theRow, theCol)

else:
button['bg'] = 'Orange'
button['fg'] = 'White'
button['command'] = lambda operation = btns_vals[key] : calc(operation)


button.grid(row=i+1, column=j, sticky="nsew")

btn_row.append(button)

buttons.append(btn_row)


button = tk.Button(root, padx=15, pady=15,bg="grey", text = 'c', font=("Arial",20))
button['command'] = clear
button.grid(row=5,column=0,columnspan=4, sticky="nsew")

root.mainloop()


////// OUTPUT : 

Calculator In Python and Tkinter


if you want the source code file, click on the download button below

download the source code


JavaScript - Search and Highlight Text using JavaScript

How to Create a Text Search and Highlight With JavaScript

How to Create a Text Search and Highlight With JavaScript


In this Javascript tutorial, we will see how to use string manipulation and regular expressions to search for specific values and highlights the matching results.
the HTML elements needed for the functionality: the textarea, search value input field, and search button. An event listener is attached to the search button, which triggers the search function when clicked.


Project Source Code:


<!DOCTYPE html>
<html>
<head>
<title>Search Value In Text</title>

<style>

*{
box-sizing: border-box;
margin: 0;
padding: 0;
font-family: sans-serif;
}

body{ background-color: #f5f5f5; }

.container{ max-width: 800px; max-width: 0 auto; padding: 20px; }

#textarea{
font-size: 16px;
line-height: 1.5;
padding: 10px;
background-color: #fff;
box-shadow: 0 2px 4px rgba(0, 0, 0, 0.1);
margin-bottom: 20px;
border-radius: 5px;
}

#search-value{
font-size: 16px;
padding: 10px;
border: none;
border-radius: 5px;
box-shadow: 0 2px 4px rgba(0, 0, 0, 0.1);
margin-right: 10px;
width: 200px;
}


#search-button{
font-size: 16px;
padding: 10px 20px;
border: none;
border-radius: 5px;
box-shadow: 0 2px 4px rgba(0, 0, 0, 0.1);
color: #fff;
cursor: pointer;
background-color: #2196f3;
transition: background-color 0.2s ease-in-out;
}

#search-button:hover{ background-color: #1976d2; }

.highlight{
background-color: red;
font-weight: bold;
color: #fff;
}

</style>


</head>
<body>

<div class="container">
<p id="textarea">You can search for a value in a textarea using
JavaScript by getting the value of the textarea,
and then using JavaScript string methods to search
for the desired value.
</p>
<input type="text" id="search-value">
<button id="search-button">Search</button>
</div>

<script>
// Get references to the HTML elements we need
const textarea = document.getElementById("textarea");
const searchValue = document.getElementById("search-value");
const searchButton = document.getElementById("search-button");

// Attach an event listener to the search button
searchButton.addEventListener("click", search);

// Define the function to be called when the search button is clicked
function search(){
// Get the text from the textarea and the search value
// from the input field
const text = textarea.innerText.trim();
const value = searchValue.value.trim();

// If either the textarea or search value is empty,
// display an error message and return
if(text === "" || value === ""){
alert("Please Enter a Value to Search For");
return;
}

// Create a regular expression to match the search value
const regex = new RegExp(value,"gi");

// Check if the textarea contains the search value
if(regex.test(text)){

// If there is a match, highlight the matching text by wrapping it
// in a span with the 'highlight' class
const highlightedText = text.replace(regex,
`<span class="highlight">$&</span>`);
textarea.innerHTML = highlightedText;

}else{
// If there is no match, display a message to the user
alert("No Match Found");
}
}

</script>

</body>
</html>


Code Explanation:

The JavaScript Implementation: The script begins by referencing the HTML elements needed for the functionality: the textarea, search value input field, and search button. 
An event listener is attached to the search button, which triggers the search function when clicked. 

The search function retrieves the text from the textarea and the search value from the input field. 
It performs validation checks to ensure that both the textarea and search value are not empty. 
If either of them is empty, an error message is displayed, and the function returns. 

Next, a regular expression is created using the search value, with the "gi" flags to perform a global and case-insensitive search. 
The regular expression is then used to test if the textarea contains a match for the search value. 

If there is a match, the script replaces the matched text with the same text wrapped in a span element with the "highlight" class. This highlights the matching text by applying the specified CSS styles. If there is no match, an alert is displayed to inform the user.


OUTPUT:

Search and Highlight Text using JavaScript

Search and Highlight Text with JavaScript


PYTHON - How To Add Delete And Update TreeView Row Using TextFields In Python Tkinter

Python - How To Insert Remove And Edit TreeView Row Using TextBoxes In Python Tkinter

Add Delete And Update TreeView Row In Python Tkinter


In this Python Tkinter Tutorial we will see How to:
- add a row to Trreview from TextFields .
- delete selected item from Trreview .
- get selected row values from Trreview to Textboxes .
- update a Trreview row using TextFields .


Project Source Code:


import tkinter as tk
from tkinter import *
from tkinter import ttk


root = Tk()
frame = tk.Frame(root, bg='#3498db')
frame_btns = tk.Frame(frame, bg='#3498db')

data = [
[1,"AAA","BBB","ab@mail.com",17],
[3,"EEE","FFF","ef@mail.com",91],
[4,"GGG","HHH","gh@mail.com",47],
[7,"MMM","NNN","mn@mail.com",25],
[8,"PPP","QQQ","pq@mail.com",43],
[9,"RRR","SSS","rs@mail.com",94],
]

label_id = tk.Label(frame, text='ID:', font=('verdana',14), bg='#3498db')
entry_id = tk.Entry(frame, font=('verdana',14))

label_fname = tk.Label(frame, text='First Name:', font=('verdana',14), bg='#3498db')
entry_fname = tk.Entry(frame, font=('verdana',14))

label_lname = tk.Label(frame, text='Last Name:', font=('verdana',14), bg='#3498db')
entry_lname = tk.Entry(frame, font=('verdana',14))

label_email = tk.Label(frame, text='Email:', font=('verdana',14), bg='#3498db')
entry_email = tk.Entry(frame, font=('verdana',14))

label_age = tk.Label(frame, text='Age:', font=('verdana',14), bg='#3498db')
entry_age = tk.Entry(frame, font=('verdana',14))

btn_add = tk.Button(frame_btns, text='Add', font=('verdana',14), bg='#f39c12',
fg='#ffffff', width=10)
btn_edit = tk.Button(frame_btns, text='Edit', font=('verdana',14), bg='#f39c12',
fg='#ffffff', width=10)
btn_remove = tk.Button(frame_btns, text='Remove', font=('verdana',14), bg='#f39c12',
fg='#ffffff', width=10)

trv = ttk.Treeview(frame, columns=(1,2,3,4,5), show='headings')
trv.column(1, anchor='center', width=100)
trv.column(2, anchor='center', width=100)
trv.column(3, anchor='center', width=100)
trv.column(4, anchor='center', width=100)
trv.column(5, anchor='center', width=100)

trv.heading(1, text='ID')
trv.heading(2, text='First Name')
trv.heading(3, text='Last Name')
trv.heading(4, text='Email')
trv.heading(5, text='Age')

# create a function to display data in treeview
def displayData():
for row in data:
trv.insert('',END, values=row)


displayData()


# create a function to display the selected row from treeview
def displaySelectedItem(a):

# clear entries
entry_id.delete(0,END)
entry_fname.delete(0,END)
entry_lname.delete(0,END)
entry_email.delete(0,END)
entry_age.delete(0,END)

selectedItem = trv.selection()[0]
entry_id.insert(0, trv.item(selectedItem)['values'][0])
entry_fname.insert(0, trv.item(selectedItem)['values'][1])
entry_lname.insert(0, trv.item(selectedItem)['values'][2])
entry_email.insert(0, trv.item(selectedItem)['values'][3])
entry_age.insert(0, trv.item(selectedItem)['values'][4])


trv.bind("<<TreeviewSelect>>", displaySelectedItem)


def add():
user_id = entry_id.get()
fname = entry_fname.get()
lname = entry_lname.get()
email = entry_email.get()
age = entry_age.get()

vals = (user_id, fname, lname, email, age)
trv.insert('', END, values=vals)


def edit():
user_id = entry_id.get()
fname = entry_fname.get()
lname = entry_lname.get()
email = entry_email.get()
age = entry_age.get()

selectedItem = trv.selection()[0]
vals = (user_id, fname, lname, email, age)
trv.item(selectedItem, values=vals)


def remove():
try:
selectedItem = trv.selection()[0]
trv.delete(selectedItem)
except:
print('Error')


btn_add['command'] = add
btn_edit['command'] = edit
btn_remove['command'] = remove


frame.grid(row=0, column=0)

label_id.grid(row=0, column=0, sticky='e')
entry_id.grid(row=0, column=1)

trv.grid(row=0, column=2, rowspan=5, padx=10, pady=10)

label_fname.grid(row=1, column=0, sticky='e')
entry_fname.grid(row=1, column=1)

label_lname.grid(row=2, column=0, sticky='e')
entry_lname.grid(row=2, column=1)

label_email.grid(row=3, column=0, sticky='e')
entry_email.grid(row=3, column=1)

label_age.grid(row=4, column=0, sticky='e')
entry_age.grid(row=4, column=1)

frame_btns.grid(row=5, column=0, columnspan=2)
btn_add.grid(row=0, column=0, padx=10, pady=10)
btn_edit.grid(row=0, column=1, padx=10, pady=10)
btn_remove.grid(row=0, column=2, padx=10, pady=10)


root.mainloop()


////// OUTPUT : 


Insert Remove And Edit TreeView Row Using TextBoxes In Python Tkinter


JavaScript - Create Custom Alerts with JavaScript and CSS

How to Create Custom Alerts with HTML, CSS, and JavaScript


How to Create Custom Alerts with HTML, CSS, and JavaScript


In this Javascript tutorial, we will see how to create and display various types of alerts (such as error, success, warning, and info) when buttons are clicked. 
Additionally, we will implement functionality that allows users to close these alerts individually.


Project Source Code:


<!DOCTYPE html>
<html>
<head>
<meta charset="UTF-8">
<meta name="viewport" content="width=device-width, initial-scale=1.0">
<meta http-equiv="X-UA-Compatible" content="ie=edge">
<title>Alerts</title>

<style>

.btn-box{ display: flex; justify-content: center; align-items: center; }

.btn-box button{ border:none; border-radius: 4px; padding: 10px 20px;
margin: 5px; font-size: 16px; cursor: pointer;
transition: background-color 0.3s ease; color: #fff;
}

.btn-box button.error-btn{ background-color: #e74c3c; }
.btn-box button.success-btn{ background-color: #27ae60; }
.btn-box button.warnning-btn{ background-color: #f39c12; }
.btn-box button.info-btn{ background-color: #3498db; }

.btn-box button:hover{ background-color: rgba(0, 0, 0, 0.1);
color:#000;
}

.alert{ padding: 20px; border-radius: 5px; text-align: center; position: relative;
width: 100%; margin: 0 auto; color: #333; font-size: 16px;
margin-bottom: 15px; box-sizing: border-box; display: none;
}
.alert p{ font-family: Arial, Helvetica, sans-serif }

.alert.error{ background-color: #ffe0e0; color: #d8000c;
border: 1px solid #d8000c;
}

.alert.success{ background-color: #e6ffe6; color: #006600;
border: 1px solid #006600;
}

.alert.warnning{ background-color: #fcc28c77; color: #ff9900;
border: 1px solid #ff9900;
}
.alert.info{ background-color: #d7f0fa; color: #4169e1;
border: 1px solid #4169e1;
}

.close{ position: absolute; top: 5px; right: 5px; cursor: pointer;
font-size: 20px; padding: 1px 4px; transition: color 0.2s ease-in-out;
}

.close:hover{ color: #fff; }

</style>

</head>

<body>

<div class="btn-box">
<button class="error-btn" id="errorBtn">Error</button>
<button class="success-btn" id="successBtn">Success</button>
<button class="warnning-btn" id="warnningBtn">Warnning</button>
<button class="info-btn" id="infoBtn">Info</button>
</div>

<div class="alert error" id="alert-error">
<p>Error</p>
<span class="close">&times;</span>
</div>

<div class="alert success" id="alert-success">
<p>Success</p>
<span class="close">&times;</span>
</div>
<div class="alert warnning" id="alert-warnning">
<p>Warnning</p>
<span class="close">&times;</span>
</div>

<div class="alert info" id="alert-info">
<p>Info</p>
<span class="close">&times;</span>
</div>


<script>
// buttons
const errorBtn = document.getElementById('errorBtn');
const successBtn = document.getElementById('successBtn');
const warnningBtn = document.getElementById('warnningBtn');
const infoBtn = document.getElementById('infoBtn');
// alerts
const alertError = document.getElementById('alert-error');
const alertSuccess = document.getElementById('alert-success');
const alertWarnning = document.getElementById('alert-warnning');
const alertInfo = document.getElementById('alert-info');

// button click event
errorBtn.onclick = function(){
alertError.style.display = "block";
}

successBtn.onclick = function(){
alertSuccess.style.display = "block";
}

warnningBtn.onclick = function(){
alertWarnning.style.display = "block";
}

infoBtn.onclick = function(){
alertInfo.style.display = "block";
}

// close alert (x)
document.getElementsByClassName('close')[0].onclick = function(){
alertError.style.display = "none";
}

document.getElementsByClassName('close')[1].onclick = function(){
alertSuccess.style.display = "none";
}

document.getElementsByClassName('close')[2].onclick = function(){
alertWarnning.style.display = "none";
}

document.getElementsByClassName('close')[3].onclick = function(){
alertInfo.style.display = "none";
}


</script>


</body>

</html>


Code Explanation:

this JavaScript code, allows users to display various alerts on button clicks and enable individual alert closure.

This JavaScript code performs the following actions:

1 - Select the buttons and alert boxes using getElementById and store them in variables.

2 - Set up event listeners for each button to show the corresponding alert when clicked.

3 - Set up event listeners for the close ("x") buttons within each alert to hide the respective alert when clicked.


OUTPUT:

Error Message

Success Message

Warnning Message

Info Message

Custom Alerts with JavaScript and CSS