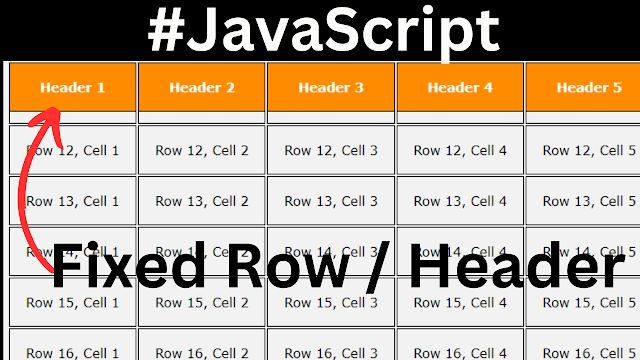
How To Make an HTML Table Row Fix In Javascript
In this Javascript tutorial, we will explore a code snippet that generates rows dynamically and implements a sticky row feature.
This feature allows a user to make a row ( including the headers ) "sticky" by clicking on it, enhancing the table's interactivity and user experience.
Project Source Code:
<!DOCTYPE html>
<html>
<head>
<title>Fixed Header/Row</title>
<style>
body{ font-family: Verdana, sans-serif; background-color: #f2f2f2; }
th, td{ border: 1px solid #000; padding: 20px; }
.sticky{ position: sticky; background-color: darkorange; color: #fff; }
.sticky-top{ top: 0; }
.sticky-bottom{ bottom: 0; }
</style>
</head>
<body>
<table id="myTable">
<thead>
<tr>
<th>Header 1</th>
<th>Header 2</th>
<th>Header 3</th>
<th>Header 4</th>
<th>Header 5</th>
<th>Header 6</th>
<th>Header 7</th>
<th>Header 8</th>
</tr>
</thead>
<tbody id="table-body">
<script>
// generate rows using js
const tableBody = document.getElementById("table-body");
for(let i = 0; i <= 20; i++){
const row = document.createElement("tr");
row.innerHTML = `<td>Row ${i}, Cell 1</td>
<td>Row ${i}, Cell 2</td>
<td>Row ${i}, Cell 3</td>
<td>Row ${i}, Cell 4</td>
<td>Row ${i}, Cell 5</td>
<td>Row ${i}, Cell 6</td>
<td>Row ${i}, Cell 7</td>
<td>Row ${i}, Cell 8</td>
`;
tableBody.appendChild(row);
}
</script>
</tbody>
</table>
<script>
// Get the table element with ID 'myTable'
const table = document.getElementById("myTable");
// Get all the rows from the table
const rows = table.getElementsByTagName("tr");
// Loop through all rows and add a click event listener to each row
for(let i = 0; i < rows.length; i++){
rows[i].addEventListener("click", function(){
// Call the makeRowSticky function when a row is clicked
makeRowSticky(this);
});
}
// Define the makeRowSticky function which makes a row "sticky" when clicked
function makeRowSticky(row){
// Remove the "sticky" class from all rows to ensure only one row
// is sticky at a time
for(let i = 0; i < rows.length; i++)
{
rows[i].classList.remove("sticky");
rows[i].classList.remove("sticky-top");
rows[i].classList.remove("sticky-bottom");
}
// Add the "sticky" class to the selected row
row.classList.add("sticky");
// If the selected row is in the top half of the table, add the "sticky-top" class
if(row.rowIndex <= rows.length / 2){
row.classList.add("sticky-top");
}
// If the selected row is in the bottom half of the table,
// add the "sticky-bottom" class
else{
row.classList.add("sticky-bottom");
}
}
</script>
</body>
</html>
Code Explanation:
1 - The HTML Structure: The code begins with an HTML table element with an ID of "myTable." It consists of a table head (thead) and a table body (tbody) section. The table head contains eight header columns (th), while the table body is initially empty..
2 - Generating Rows with JavaScript: To dynamically populate the table with rows, the JavaScript code generates 20 rows within the table body. The script uses a for loop to create each row and assigns it a unique identifier. Each row contains eight cells (td), with the content dynamically generated using template literals. The row creation and population process is achieved through the DOM manipulation method, appendChild(), which appends the created row to the table body.
3 - Implementing Sticky Rows: After populating the table, the JavaScript code proceeds to implement the sticky row functionality. It first retrieves all the rows from the table using the getElementsByTagName() method and stores them in the "rows" variable. Then, a loop iterates through each row and attaches a click event listener to it.
When a row is clicked, the makeRowSticky() function is called. This function adds or removes CSS classes to achieve the desired sticky effect. Initially, all rows have the "sticky," "sticky-top," or "sticky-bottom" classes removed to ensure only one row is sticky at a time.
The makeRowSticky() function adds the "sticky" class to the selected row, making it stand out visually. Additionally, it checks the position of the clicked row within the table. If the row is in the top half, it adds the "sticky-top" class; if it is in the bottom half, it adds the "sticky-bottom" class. These classes can be customized with corresponding CSS styles to make the row visually distinctive.
OUTPUT:

