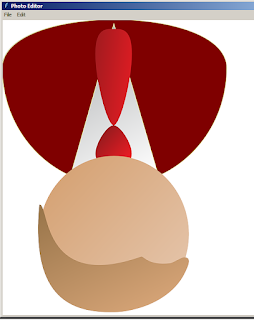
Python Photo Editor: Create an Image Editor with Tkinter

How to Create an Image Editor Project in Python Using Tkinter

Image Editor Project in Python Using Tkinter


In this Python tutorial, we will see how to create a simple photo editor application using Tkinter for the GUI and the Pillow library for image manipulation
This photo editor application allows users to open an image and apply various editing effects such as blur, grayscale, brightness enhancement, rotation, color inversion, edge detection, and mirroring.
Users can also crop the image interactively.

What We Are Gonna Use In This Project:

- Python Programming Language.
- Tkinter for GUI.
- VS Code Editor.


Project Source Code:


import tkinter as tk
from tkinter import filedialog, simpledialog
# pip install Pillow
from PIL import Image, ImageTk, ImageFilter, ImageEnhance, ImageOps, ImageChops

class PhotoEditorApp:
def __init__(self, root):
self.root = root
self.root.title("Photo Editor")
self.root.geometry("750x450")
self.canvas = tk.Canvas(self.root, bg="white")
self.canvas.pack(fill=tk.BOTH, expand=True)

# Create menu bar
self.menubar = tk.Menu(self.root)
self.root.config(menu = self.menubar)

# Create File menu with Open and Exit options
self.file_menu = tk.Menu(self.menubar, tearoff=0)
self.menubar.add_cascade(label="File", menu = self.file_menu)
self.file_menu.add_command(label = "Open", command = self.open_image)
self.file_menu.add_separator()
self.file_menu.add_command(label = "Exit", command = self.root.quit)

# Create Edit menu with various image manipulation options
self.edit_manu = tk.Menu(self.menubar, tearoff = 0)
self.menubar.add_cascade(label = "Edit", menu=self.edit_manu)
self.edit_manu.add_command(label = "Blur", command = self.apply_blur)
self.edit_manu.add_command(label = "Grayscale", command = self.apply_grayscale)
self.edit_manu.add_command(label = "Enhance Brightness",
        command = self.enhance_brightness)
self.edit_manu.add_command(label = "Rotate", command = self.rotate_image)
self.edit_manu.add_command(label = "Crop", command = self.crop_image)
self.edit_manu.add_command(label = "Invert Colors",
        command = self.inver_colors)
self.edit_manu.add_command(label = "Edge Detection",
        command = self.edge_detection)
self.edit_manu.add_command(label = "Mirror", command = self.mirror_image)
self.edit_manu.add_command(label = "Original State",
        command = self.display_original_state)


# Variables for cropping
self.crop_start_x = None
self.crop_start_y = None
self.crop_rect = None

# Bind events for cropping
self.canvas.bind("<Button-1>", self.start_crop)
self.canvas.bind("<B1-Motion>", self.update_crop)
self.canvas.bind("<ButtonRelease-1>", self.crop_image)


def open_image(self):
# Open a file dialog to select an image file
file_path = filedialog.askopenfilename(filetypes = [("Image Files" ,
        "*.png *.jpg *.jpeg *.bmp *.gif")])

if file_path:
# Open the selected image file using PIL
self.image = Image.open(file_path)
# Save a copy of the original image
self.original_image = self.image.copy()
self.image_tk = ImageTk.PhotoImage(self.image)
# Display the image on the canvas
self.canvas.create_image(0,0, anchor = tk.NW, image=self.image_tk)


def apply_blur(self):
# Apply a blur filter to the image
if self.image:
blurred_image = self.image.filter(ImageFilter.BLUR)
self.display_image(blurred_image)


def apply_grayscale(self):
# Convert the image to grayscale
if self.image:
grayscale_image = self.image.convert("L")
self.display_image(grayscale_image)


def enhance_brightness(self):
# Enhance the brightness of the image
if self.image:
enhancer = ImageEnhance.Brightness(self.image)
enhanced_image = enhancer.enhance(1.5)
self.display_image(enhanced_image)


def rotate_image(self):
# Rotate the image based on user input
if self.image:
degrees = simpledialog.askinteger("Rotate Image",
            "Enter rotation angle(degrees):", parent = self.root)
if degrees:
rotated_image = self.image.rotate(degrees, expand=True)
self.display_image(rotated_image)


def inver_colors(self):
# Invert the colors of the image
if self.image:
inverted_image = ImageOps.invert(self.image)
self.display_image(inverted_image)

def edge_detection(self):
# Apply edge detection filter to the image
if self.image:
edge_detection = self.image.filter(ImageFilter.FIND_EDGES)
self.display_image(edge_detection)


def mirror_image(self):
# Mirror the image horizontally
if self.image:
mirrored_image = ImageOps.mirror(self.image)
self.display_image(mirrored_image)


def start_crop(self, event):
# Record the starting position of the crop
self.crop_start_x = self.canvas.canvasx(event.x)
self.crop_start_y = self.canvas.canvasy(event.y)


def update_crop(self, event):
"""
Update the crop rectangle during mouse motion.

Args:
event: Mouse event containing information about the current mouse position.
"""
# Get current mouse position relative to the canvas
cur_x = self.canvas.canvasx(event.x)
cur_y = self.canvas.canvasy(event.y)

# Delete previous crop rectangle if it exists
if self.crop_rect:
self.canvas.delete(self.crop_rect)

# Create a new crop rectangle based on the starting position
        # and current position
self.crop_rect = self.canvas.create_rectangle(self.crop_start_x,
        self.crop_start_y, cur_x, cur_y, outline="red")


def crop_image(self, event=None):
"""
Crop the image based on the crop rectangle.

Args:
event: Mouse event triggering the crop action (optional).
"""
if self.crop_rect:
# Get current mouse position relative to the canvas
if event:
cur_x = self.canvas.canvasx(event.x)
cur_y = self.canvas.canvasy(event.y)

# Determine the coordinates of the crop rectangle
x1, y1 = min(self.crop_start_x, cur_x), min(self.crop_start_y, cur_y)
x2, y2 = max(self.crop_start_x, cur_x), max(self.crop_start_y, cur_y)

# Crop the image using the determined coordinates
cropped_image = self.image.crop((x1, y1, x2, y2))
self.display_image(cropped_image)

# Delete the crop rectangle
self.canvas.delete(self.crop_rect)
self.crop_rect = None


def display_original_state(self):
# Display the image in its original state
if self.image:
self.display_image(self.original_image)

def display_image(self, img):
# Display the given image on the canvas
self.image = img
self.image_tk = ImageTk.PhotoImage(self.image)
self.canvas.create_image(0, 0, anchor = tk.NW, image = self.image_tk)


if __name__ == "__main__":
root = tk.Tk()
app = PhotoEditorApp(root)
root.mainloop()


The Final Result:

Image Editor App In Python Tkinter

Edge Detection
Edge Detection

GrayScale
GrayScale

rotate (180 degree)
rotate (180 degree)

brightness enhancement

grayscale 2
grayscale

blur
blur

original image

invert colors
invert colors

edge detection
edge detection

crop image
crop image

mirror
mirror


Create an Image Slicer Using JavaScript

How to Split an Image Into Pieces Using JavaScript

How to Split an Image Into Pieces Using JavaScript


In this Javascript Tutorial, we will see how to create a responsive Image Slicer web application using pure HTML, CSS, and JavaScript.
When a user selects an image and specifies the number of slices, our JavaScript handles all the functionality including file reading, image processing, and dynamic grid generation.


Project Source Code:


<!DOCTYPE html>
<html lang="en">
<head>
<meta charset="UTF-8"> <!-- Set character encoding -->
<meta name="viewport" content="width=device-width, initial-scale=1.0">
<title>Image Slicer</title>
<style>

:root{
--primary-color:#3498db;
--secondary-color:#2ecc71;
--background-color:#f4f6f8;
--text-color:#2c3e50;
--card-background:#fff;
--slice-background:#ecf0f1;
--input-background:#e0e5ec;
--shadow-color:rgba(0,0,0,0.1);
}

*{ box-sizing:border-box; margin: 0; padding: 0; }

body{
font-family: 'Courier New', Courier, monospace;
background-color: var(--background-color);
color: var(--text-color);
display: flex; justify-content: center;
align-items: center;
min-height: 100vh; padding: 20px;
}

.container{
background-color: var(--card-background);
padding: 40px; border-radius: 20px;
box-shadow: 0 10px 30px var(--shadow-color);
max-width: 800px; width: 100%;
text-align: center;
}

h1{
margin-bottom: 30px; font-size: 36px; font-weight: 700;
color: var(--primary-color);
}

.file-input-wrapper{
position: relative; display: inline-block;
margin-bottom: 30px
}

.file-input-wrapper input[type="file"]{
position: absolute; left: -9999px;
}

.file-input-wrapper label{
display: inline-block; padding: 12px 24px;
color: #fff; background-color: var(--primary-color);
font-size: 16px; font-weight: 600;
border-radius: 30px; cursor: pointer;
transition: all 0.3s ease;
}

.file-input-wrapper label:hover{
background-color: var(--secondary-color);
transform: translateY(-2px);
box-shadow: 0 4px 10px var(--secondary-color);
}

.slice-input{
display: flex; justify-content: center;
align-items: center; margin-bottom: 30px;
}

.slice-input label{
margin-right: 15px; font-weight: 600; font-size: 18px;
}

.slice-input input{
width: 80px; padding: 10px; border: none; border-radius: 15px;
background-color: var(--input-background);
color: var(--text-color); font-size: 18px;
text-align: center; transition: all 0.3s ease;
}

.slice-input input:focus{
outline: none; box-shadow: 0 0 0 2px var(--primary-color);
}

.slice-container{
display: grid; grid-gap: 5px; margin-top: 30px;
}

.slice{
position: relative; border-radius: 5px;
background-color: var(--slice-background);
box-shadow: 0 4px 10px var(--shadow-color);
overflow: hidden; transition: all 0.3s ease;
}

.slice img{
width: 100%; height: auto; object-fit: cover; display: block;
}

@keyframes fadeInUp{
from{ opacity: 0; transform: translateY(20px); }
to{ opacity: 1; transform: translateY(0); }
}

.slice{ animation: fadeInUp 0.5s ease forwards; }

</style>
</head>
<body>


<div class="container">

<h1>Image Slicer</h1>

<div class="file-input-wrapper">
<input type="file" id="fileInput" accept="image/*">
<label for="fileInput">Choose an image</label>
</div>

<div class="slice-input">
<label for="sliceNumber">Slices:</label>
<input type="number" id="sliceNumber" min="2" max="100" value="4">
</div>

<div class="slice-container" id="sliceContainer"></div>

</div>


<script>
// Get DOM elements
const fileInput = document.getElementById('fileInput');
const sliceNumber = document.getElementById('sliceNumber');
const sliceContainer = document.getElementById('sliceContainer');
let currentImage = null;

// Add event listeners to handle user interactions
fileInput.addEventListener("change", handleFileUpload);
fileInput.addEventListener("change", handleSliceNumberChange);
sliceNumber.addEventListener("change", handleSliceNumberChange);

/**
* Handles the file upload and slicing process
* @param {Event} event - The change event from the file input
*/
function handleFileUpload(event){
// Gets the first uploaded file
const file = event.target.files[0];
if(file){
// Creates a new FileReader to read the file
const reader = new FileReader();
// Executes when file reading is complete
reader.onload = function(e){
// Creates a new Image object
const img = new Image();
// Sets the image source to the loaded file
img.src = e.target.result;
// Executes when the image is fully loaded
img.onload = function(){
// Stores the loaded image for later use
currentImage = img;
// Calls function to slice the image based on the input value
sliceImage(img, parseInt(sliceNumber.value));
}
}
reader.readAsDataURL(file);
}
}


/**
* Handles changes in the number of slices
*/
function handleSliceNumberChange(){
// Checks if there is a currently loaded image
if(currentImage){
// Re-slices the current image based on the new number
sliceImage(currentImage, parseInt(sliceNumber.value));
}
}


/**
* Slices the image into a grid of smaller images
* @param {Image} image - The image to be sliced
* @param {number} slices - The number of slices per side (e.g., 4 for a 4x4 grid)
*/
function sliceImage(image, slices){

// Clears previous slices from the container
sliceContainer.innerHTML = '';
// Sets up the grid layout for the slices
sliceContainer.style.gridTemplateColumns = `repeat(${slices}, 1fr)`;
// Creates a new canvas element to draw slices
const canvas = document.createElement('canvas');
// Gets the 2D drawing context for the canvas
const ctx = canvas.getContext('2d');
// Calculates the width of each slice
const sliceWidth = image.width / slices;
// Calculates the height of each slice
const sliceHeight = image.height / slices;
// Sets the canvas width to the slice width
canvas.width = sliceWidth;
// Sets the canvas height to the slice height
canvas.height = sliceHeight;
// Loop through each row and column to create individual slices
for(let row = 0; row < slices; row++){
for(let col = 0; col < slices; col++){
// Clears the canvas for the next slice
ctx.clearRect(0, 0, sliceWidth, sliceHeight);
// Draws the current slice from the original image onto the canvas
ctx.drawImage(image, col * sliceWidth, row * sliceHeight,
sliceWidth, sliceHeight, 0, 0, sliceWidth, sliceHeight);

// Creates an image element for the slice
const sliceImage = document.createElement('img');
// Converts the canvas to a Data URL and sets it as the image source
sliceImage.src = canvas.toDataURL();
// Creates a div to hold the slice image
const sliceDiv = document.createElement('div');
// Assigns the 'slice' class for styling
sliceDiv.className = 'slice';
// Sets a delay for each slice's animation for a staggered effect
sliceDiv.style.animationDelay = `${(row * slices + col) * 0.05}s`;
// Appends the image to the slice div
sliceDiv.appendChild(sliceImage);
// Appends the slice div to the main slice container
sliceContainer.appendChild(sliceDiv);
}
}


}

</script>

</body>
</html>


OUTPUT:

Sliced Image Using Javascript 1

Sliced Image Using Javascript 2

Sliced Image Using Javascript 3


Python Tkinter 3D Bar Chart

How to Create a 3D Bar Chart In Python Tkinter

Python Tkinter 3D Bar Chart


In this Python tutorial we will create a 3D bar char using the Tkinter library for the graphical user interface. 
Each bar features a distinct front, top, and side face, creating a three-dimensional appearance.

What We Are Gonna Use In This Project:

- Python Programming Language.
- Tkinter for GUI.
- VS Code Editor.


Project Source Code:


import tkinter as tk
import random

class ThreeDBarChartPanel(tk.Canvas):

def __init__(self, master=None, **kwargs):
# Initialize the ThreeDBarChartPanel as a Canvas
super().__init__(master, **kwargs)
# Bar Colors
self.color_side_face = "#2c3e50"
self.color_top_face = "#e74c3c"
self.color_front_face = "#3498db"
# Draw the 3D bar chart
self.draw_chart()

def draw_chart(self):
width = self.winfo_reqwidth()
height = self.winfo_reqheight()
num_bars = 10
bar_width = 40
bar_spacing = 30

base_x = (width - (num_bars * (bar_width + bar_spacing) - bar_spacing)) /2
base_y = height - 100

labels = [f"label{i}" for i in range(1, num_bars + 1)]

# Draw horizontal lines for reference
num_horizontal_lines = 5
horizontal_spacing = (base_y - 50) // num_horizontal_lines

for i in range(num_horizontal_lines + 1):
y = base_y - i * horizontal_spacing
#self.create_line(30, y, width - 20, y, fill="lightgray", dash=(2,2))
self.create_line(30, y, width - 20, y, fill="lightgray")

# Draw Bars
for i in range(num_bars):
x = base_x + i * (bar_width + bar_spacing)
bar_height = random.randint(50, 250)
z = 10

# Draw the front face of the bar
self.create_rectangle(x, base_y - bar_height, x + bar_width, base_y,
            fill=self.color_front_face)

# Draw the top face of the bar
top_face = [ x, base_y - bar_height, x + bar_width, base_y-bar_height,
            x + bar_width + z, base_y - bar_height-z, x + z, base_y - bar_height-z ]
self.create_polygon(top_face, fill=self.color_top_face)

# Draw the side face of the bar
side_face = [ x + bar_width, base_y - bar_height, x + bar_width, base_y,
            x + bar_width + z, base_y - z, x + bar_width + z, base_y - bar_height-z ]
self.create_polygon(side_face, fill=self.color_side_face)

# Draw vertical axis labels
axis_label_x = x + bar_width / 2
axis_label_y = base_y + 20
self.create_text(axis_label_x, axis_label_y, text=labels[i])


# Draw horizontal axis labels
num_ticks = 5
tick_spacing = (base_y - 50) / num_ticks
self.create_text(base_x - 20, base_y - 5, text="0")

for i in range(1, num_ticks + 1):
tick_value = 40 + i * 40
self.create_text(base_x - 30, base_y - i * tick_spacing,
            text = str(tick_value))


class ThreeDBarChartApp:
def __init__(self, root):
self.root = root
self.root.title("3D Bar Chart")
self.root.geometry("800x500")
self.root.resizable(False, False)

# Create and pack the ThreeDBarChartPanel
self.chartPanel = ThreeDBarChartPanel(self.root, bg="white", width="800",
        height="400")
self.chartPanel.pack(expand=True, fill="both")


if __name__ == "__main__":
root = tk.Tk()
app = ThreeDBarChartApp(root)
root.mainloop()


The Final Result:

How to Create a 3D Bar Chart In Python Tkinter