PYTHON - How To Make MySQL Database Records Navigation Buttons [First - Next - Previous - Last] In Python Tkinter

PYTHON - How To Make MySQL Database Navigation Buttons In Python Tkinter

Make MySQL Database Records Navigation Buttons In Python Tkinter


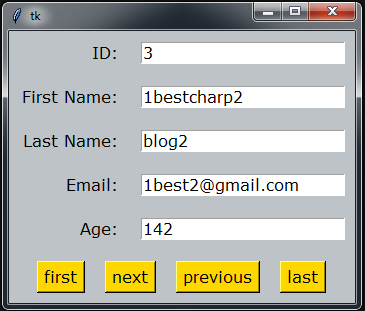
In this Python tutorial, we'll learn how to build a navigation app using data from a MySQL Database
The app will feature buttons such as NEXT, PREVIOUS, LAST, and FIRST, 
all implemented using Python's Tkinter library along with MySQL Database integration and VsCode IDE.


Project Source Code:


import tkinter as tk
from tkinter import *
import mysql.connector


connection = mysql.connector.connect(host='localhost', user='root', port='3306',
password='', database='test_py')
c = connection.cursor()
index = 0

c.execute("SELECT * FROM `users_2`")
users = c.fetchall()

print(users)

root = Tk()

frame = tk.Frame(root, bg='#bdc3c7')

label_id = tk.Label(frame, text='ID:', font=('verdana',12), bg='#bdc3c7')
entry_id = tk.Entry(frame, font=('verdana',12))

label_fname = tk.Label(frame, text='First Name:', font=('verdana',12), bg='#bdc3c7')
entry_fname = tk.Entry(frame, font=('verdana',12))

label_lname = tk.Label(frame, text='Last Name:', font=('verdana',12), bg='#bdc3c7')
entry_lname = tk.Entry(frame, font=('verdana',12))

label_email = tk.Label(frame, text='Email:', font=('verdana',12), bg='#bdc3c7')
entry_email = tk.Entry(frame, font=('verdana',12))

label_age = tk.Label(frame, text='Age:', font=('verdana',12), bg='#bdc3c7')
entry_age = tk.Entry(frame, font=('verdana',12))

frame_buttons = tk.Frame(frame, bg='#bdc3c7')

button_first = tk.Button(frame_buttons, text = 'first', font=('verdana',12), bg='gold')
button_next = tk.Button(frame_buttons, text = 'next', font=('verdana',12), bg='gold')
button_previous = tk.Button(frame_buttons, text = 'previous', font=('verdana',12),
bg='gold')
button_last = tk.Button(frame_buttons, text = 'last', font=('verdana',12), bg='gold')


# function to clear textfields
def clearTextfields():
# clear textfields
entry_id.delete(0,END)
entry_fname.delete(0,END)
entry_lname.delete(0,END)
entry_email.delete(0,END)
entry_age.delete(0,END)


# function to show first item
def showFirst():
clearTextfields()

global index
index = 0
entry_id.insert(0,users[index][0])
entry_fname.insert(0,users[index][1])
entry_lname.insert(0,users[index][2])
entry_email.insert(0,users[index][3])
entry_age.insert(0,users[index][4])


# function to show next item
def showNext():

clearTextfields()

global index
index = index+1
if index > len(users)-1:
index = len(users)-1

entry_id.insert(0,users[index][0])
entry_fname.insert(0,users[index][1])
entry_lname.insert(0,users[index][2])
entry_email.insert(0,users[index][3])
entry_age.insert(0,users[index][4])


# function to show previous item
def showPrevious():

clearTextfields()

global index
index = index-1
if index < 0:
index =0

entry_id.insert(0,users[index][0])
entry_fname.insert(0,users[index][1])
entry_lname.insert(0,users[index][2])
entry_email.insert(0,users[index][3])
entry_age.insert(0,users[index][4])


# function to show last item
def showLast():

clearTextfields()

global index
index = len(users)-1
entry_id.insert(0,users[index][0])
entry_fname.insert(0,users[index][1])
entry_lname.insert(0,users[index][2])
entry_email.insert(0,users[index][3])
entry_age.insert(0,users[index][4])


button_first['command'] = showFirst
button_next['command'] = showNext
button_previous['command'] = showPrevious
button_last['command'] = showLast


frame.grid(row=0, column=0)

label_id.grid(row=0, column=0, sticky='e', padx=10, pady=10)
entry_id.grid(row=0, column=1, padx=10, pady=10)

label_fname.grid(row=1, column=0, sticky='e', padx=10, pady=10)
entry_fname.grid(row=1, column=1, padx=10, pady=10)

label_lname.grid(row=2, column=0, sticky='e', padx=10, pady=10)
entry_lname.grid(row=2, column=1, padx=10, pady=10)

label_email.grid(row=3, column=0, sticky='e', padx=10, pady=10)
entry_email.grid(row=3, column=1, padx=10, pady=10)

label_age.grid(row=4, column=0, sticky='e', padx=10, pady=10)
entry_age.grid(row=4, column=1, padx=10, pady=10)

frame_buttons.grid(row=5, column=0, columnspan=2)

button_first.grid(row=0, column=0, padx=10, pady=10)
button_next.grid(row=0, column=1, padx=10, pady=10)
button_previous.grid(row=0, column=2, padx=10, pady=10)
button_last.grid(row=0, column=3, padx=10, pady=10)

root.mainloop()


OUTPUT:

Make MySQL Database Data Navigation Buttons In Python Tkinter


JavaScript - How to Create a Fixed HTML Table Column with JavaScript

Creating a Sticky HTML Table Column with JavaScript

Creating a Sticky HTML Table Column with JavaScript


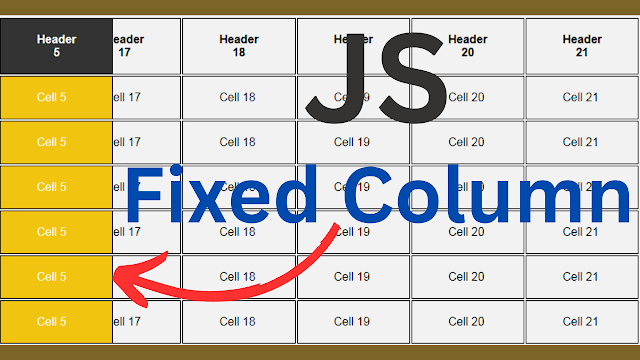
In this Javascript tutorial, we will explore a JavaScript code that make the selected html table column sticky.
The fixed column table allows you to keep certain columns visible while scrolling through a large dataset, improving the readability and usability of the table.


Project Source Code:


<!DOCTYPE html>
<html>
<head>
<title>Fixed Column</title>

<style>

body{ background-color: #f2f2f2; font-family: Helvetica, sans-serif }
th{ cursor: pointer; }

th,td{ border: 1px solid #000; padding: 20px 50px;}

.sticky{ position: sticky; background-color: #f1c40f; color: #fff; }

.sticky-header{ position: sticky; background-color: #333; color: #fff; }

.sticky-right{ right: 0; }

.sticky-left{ left: 0; }

</style>

</head>
<body>

<table id="myTable">
<thead>
<tr>
<th>Header 1</th>
<th>Header 2</th>
<th>Header 3</th>
<th>Header 4</th>
<th>Header 5</th>
<th>Header 6</th>
<th>Header 7</th>
<th>Header 8</th>
<th>Header 9</th>
<th>Header 10</th>
<th>Header 11</th>
<th>Header 12</th>
<th>Header 13</th>
<th>Header 14</th>
<th>Header 15</th>
<th>Header 16</th>
<th>Header 17</th>
<th>Header 18</th>
<th>Header 19</th>
<th>Header 20</th>
<th>Header 21</th>
<th>Header 22</th>
<th>Header 23</th>
<th>Header 24</th>
</tr>
</thead>
<tbody>
<tr>
<td>Cell 1</td>
<td>Cell 2</td>
<td>Cell 3</td>
<td>Cell 4</td>
<td>Cell 5</td>
<td>Cell 6</td>
<td>Cell 7</td>
<td>Cell 8</td>
<td>Cell 9</td>
<td>Cell 10</td>
<td>Cell 11</td>
<td>Cell 12</td>
<td>Cell 13</td>
<td>Cell 14</td>
<td>Cell 15</td>
<td>Cell 16</td>
<td>Cell 17</td>
<td>Cell 18</td>
<td>Cell 19</td>
<td>Cell 20</td>
<td>Cell 21</td>
<td>Cell 22</td>
<td>Cell 23</td>
<td>Cell 24</td>
</tr>
</tbody>
</table>

<script>

// Get all table header cells
const headerCells = document.querySelectorAll("#myTable th");

// For each header cell, add a click event listener that calls
// makeColumnSticky function
headerCells.forEach(function(headerCell,index){
headerCell.addEventListener("click", function(){
makeColumnSticky(index);
});
});

// This function adds "sticky" class to all cells in a clicked column
// and removes it from all other cells
function makeColumnSticky(columnIndex){
const table = document.getElementById("myTable");
const cells = table.querySelectorAll("td");

// Remove "sticky" class from all cells in same column
cells.forEach(cell => {
cell.classList.remove("sticky");
cell.classList.remove("sticky-right");
cell.classList.remove("sticky-left");
});

// Remove "sticky-header" class from all header cells
headerCells.forEach(hcell => {
hcell.classList.remove("sticky-header");
});

// Add "sticky-header" class to the clicked header cell
headerCells[columnIndex].classList.add("sticky-header");

// Add "sticky" class to all cells in clicked column
cells.forEach(function(cell, index){
if(columnIndex >= headerCells.length/2){
// Add "sticky-right" class to the right half of the table
headerCells[columnIndex].classList.add("sticky-right");

if(index % headerCells.length === columnIndex){
// Add "sticky" and "sticky-right"
// classes to the cell in the clicked column
cell.classList.add("sticky");
cell.classList.add("sticky-right");
}
}
else{
// Add "sticky-left" class to the left half of the table
headerCells[columnIndex].classList.add("sticky-left");

if(index % headerCells.length === columnIndex){
// Add "sticky" and "sticky-left"
// classes to the cell in the clicked column
cell.classList.add("sticky");
cell.classList.add("sticky-left");
}
}

});

}


</script>

</body>
</html>


Code Explanation:

- Getting Header Cells: The script selects all the table header cells using the querySelectorAll() method and stores them in the headerCells variable.

- Attaching Event Listeners: For each header cell, a click event listener is added. When a header cell is clicked, the makeColumnSticky() function is called, passing the index of the clicked header cell as an argument.

- makeColumnSticky() Function: This function takes the clicked column index as a parameter. It first removes the "sticky" and "sticky-header" classes from all cells and header cells, respectively.

Making Columns Sticky: Based on the clicked column index, the function adds the appropriate classes to the cells and header cells. If the clicked column is in the right half of the table, the "sticky-right" class is added to the header cell. If the column is in the left half, the "sticky-left" class is added. Additionally, the cells in the clicked column are assigned the "sticky" class along with the corresponding "sticky-right" or "sticky-left" class.


OUTPUT:

Sticky HTML Table Column with JavaScript


JavaScript - Create a Fixed Table Row

How To Make an HTML Table Row Fix In Javascript  


JavaScript - Create a Fixed Table Row


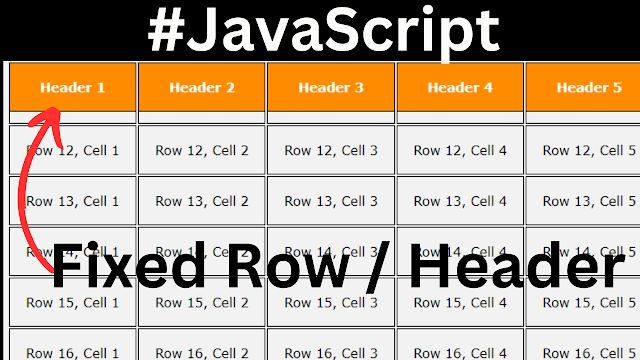
In this Javascript tutorial, we will explore a code snippet that generates rows dynamically and implements a sticky row feature. 
This feature allows a user to make a row ( including the headers ) "sticky" by clicking on it, enhancing the table's interactivity and user experience.


Project Source Code:


<!DOCTYPE html>
<html>
<head>
<title>Fixed Header/Row</title>
<style>
body{ font-family: Verdana, sans-serif; background-color: #f2f2f2; }

th, td{ border: 1px solid #000; padding: 20px; }

.sticky{ position: sticky; background-color: darkorange; color: #fff; }

.sticky-top{ top: 0; }

.sticky-bottom{ bottom: 0; }

</style>
</head>
<body>

<table id="myTable">

<thead>
<tr>
<th>Header 1</th>
<th>Header 2</th>
<th>Header 3</th>
<th>Header 4</th>
<th>Header 5</th>
<th>Header 6</th>
<th>Header 7</th>
<th>Header 8</th>
</tr>
</thead>
<tbody id="table-body">

<script>
// generate rows using js
const tableBody = document.getElementById("table-body");
for(let i = 0; i <= 20; i++){

const row = document.createElement("tr");
row.innerHTML = `<td>Row ${i}, Cell 1</td>
<td>Row ${i}, Cell 2</td>
<td>Row ${i}, Cell 3</td>
<td>Row ${i}, Cell 4</td>
<td>Row ${i}, Cell 5</td>
<td>Row ${i}, Cell 6</td>
<td>Row ${i}, Cell 7</td>
<td>Row ${i}, Cell 8</td>
`;

tableBody.appendChild(row);

}

</script>


</tbody>

</table>


<script>

// Get the table element with ID 'myTable'
const table = document.getElementById("myTable");

// Get all the rows from the table
const rows = table.getElementsByTagName("tr");

// Loop through all rows and add a click event listener to each row
for(let i = 0; i < rows.length; i++){
rows[i].addEventListener("click", function(){
// Call the makeRowSticky function when a row is clicked
makeRowSticky(this);
});
}

// Define the makeRowSticky function which makes a row "sticky" when clicked
function makeRowSticky(row){
// Remove the "sticky" class from all rows to ensure only one row
// is sticky at a time
for(let i = 0; i < rows.length; i++)
{
rows[i].classList.remove("sticky");
rows[i].classList.remove("sticky-top");
rows[i].classList.remove("sticky-bottom");
}

// Add the "sticky" class to the selected row
row.classList.add("sticky");

// If the selected row is in the top half of the table, add the "sticky-top" class
if(row.rowIndex <= rows.length / 2){
row.classList.add("sticky-top");
}

// If the selected row is in the bottom half of the table,
// add the "sticky-bottom" class
else{
row.classList.add("sticky-bottom");
}

}

</script>

</body>
</html>


Code Explanation:


1 - The HTML Structure: The code begins with an HTML table element with an ID of "myTable." It consists of a table head (thead) and a table body (tbody) section. The table head contains eight header columns (th), while the table body is initially empty..

2 - Generating Rows with JavaScript: To dynamically populate the table with rows, the JavaScript code generates 20 rows within the table body. The script uses a for loop to create each row and assigns it a unique identifier. Each row contains eight cells (td), with the content dynamically generated using template literals. The row creation and population process is achieved through the DOM manipulation method, appendChild(), which appends the created row to the table body.

3 - Implementing Sticky Rows: After populating the table, the JavaScript code proceeds to implement the sticky row functionality. It first retrieves all the rows from the table using the getElementsByTagName() method and stores them in the "rows" variable. Then, a loop iterates through each row and attaches a click event listener to it.

When a row is clicked, the makeRowSticky() function is called. This function adds or removes CSS classes to achieve the desired sticky effect. Initially, all rows have the "sticky," "sticky-top," or "sticky-bottom" classes removed to ensure only one row is sticky at a time.

The makeRowSticky() function adds the "sticky" class to the selected row, making it stand out visually. Additionally, it checks the position of the clicked row within the table. If the row is in the top half, it adds the "sticky-top" class; if it is in the bottom half, it adds the "sticky-bottom" class. These classes can be customized with corresponding CSS styles to make the row visually distinctive.


OUTPUT:


Create a Fixed Table Row In JavaScript