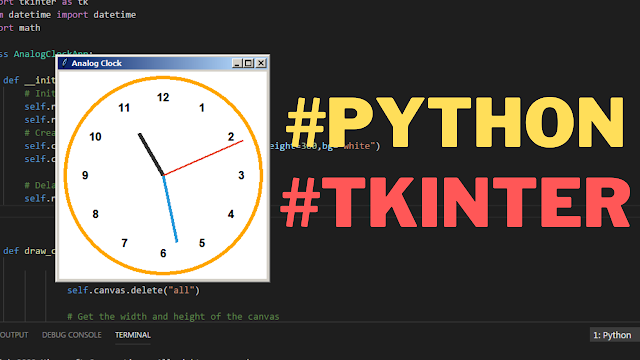
How to Create Analog Clock In Python Tkinter
In this Python tutorial we will create an analog clock application using the Tkinter library for the graphical user interface.
The clock displays an animated face with hour, minute, and second hands that update every second to reflect the current time.
What We Are Gonna Use In This Project:
- Python Programming Language.- Tkinter for GUI.
- VS Code Editor.
- VS Code Editor.
Project Source Code:
import tkinter as tk
from datetime import datetime
import math
class AnalogClockApp:
def __init__(self,root):
# Initialize the Tkinter window
self.root = root
self.root.title("Analog Clock")
# Create a canvas for drawing the clock
self.canvas = tk.Canvas(self.root, width=300,height=300,bg="white")
self.canvas.pack()
# Delay the initial drawing
self.root.after(100, self.draw_clock)
def draw_clock(self):
# Clear the canvas
self.canvas.delete("all")
# Get the width and height of the canvas
width = self.canvas.winfo_width()
height = self.canvas.winfo_height()
# Calculate the center coordinates of the canvas
center_x = width // 2
center_y = height // 2
# Draw clock face, numbers, and hands
clock_radius = min(width, height) // 2 - 10
self.canvas.create_oval(center_x - clock_radius,
center_y - clock_radius,
center_x + clock_radius,
center_y + clock_radius,
outline = "orange", width = 5)
# Draw clock numbers
for i in range(1, 13):
# Calculate the angle for positioning each number around the clock face
angle = math.radians(360 / 12 * (i - 3))
# Calculate the x-coordinate of the number position
# based on the clock radius and angle
num_x = center_x + int(clock_radius * 0.8 * math.cos(angle))
# Calculate the y-coordinate of the number position
# based on the clock radius and angle
num_y = center_y + int(clock_radius * 0.8 * math.sin(angle))
# Create a text element to display the number at the calculated position
self.canvas.create_text(num_x, num_y, text=str(i),
font=("Helvetica", 12, "bold"))
# Get current time
current_time = datetime.now()
# Calculate the angle for the hour hand based on the current hour
hours_angle = math.radians(360 / 12 * (current_time.hour % 12 - 3))
# Calculate the angle for the minute hand based on the current minute
minutes_angle = math.radians(360 / 60 * (current_time.minute - 15))
# Calculate the angle for the second hand based on the current second
seconds_angle = math.radians(360 / 60 * (current_time.second - 15))
# Set the length of the hour hand
hour_hand_length = clock_radius * 0.5
# Set the length of the minute hand
minute_hand_length = clock_radius * 0.7
# Set the length of the second hand
second_hand_length = clock_radius * 0.9
# Calculate the x-coordinate of the hour hand
hour_hand_x = center_x + int(hour_hand_length * math.cos(
hours_angle))
# Calculate the y-coordinate of the hour hand
hour_hand_y = center_y + int(hour_hand_length * math.sin(
hours_angle))
# Draw the hour hand
self.canvas.create_line(center_x, center_y, hour_hand_x,
hour_hand_y, fill="#333", width=6)
# Calculate the x-coordinate of the minute hand
minute_hand_x = center_x + int(minute_hand_length * math.cos(
minutes_angle))
# Calculate the y-coordinate of the minute hand
minute_hand_y = center_y + int(minute_hand_length * math.sin(
minutes_angle))
# Draw the minute hand
self.canvas.create_line(center_x, center_y, minute_hand_x,
minute_hand_y, fill="#3498db", width=4)
# Calculate the x-coordinate of the second hand
second_hand_x = center_x + int(second_hand_length * math.cos(
seconds_angle))
# Calculate the y-coordinate of the second hand
second_hand_y = center_y + int(second_hand_length * math.sin(
seconds_angle))
# Draw the second hand
self.canvas.create_line(center_x, center_y, second_hand_x,
second_hand_y, fill="#e74c32", width=2)
# Update the clock every second
# Schedule the draw_clock method to be called after 1000 milliseconds
self.root.after(1000, self.draw_clock)
if __name__ == "__main__":
root = tk.Tk()
app = AnalogClockApp(root)
root.mainloop()

